Two years ago, I watched a deputy fumble in near-darkness trying to line up his factory Glock sights on a wounded mountain lion. Those plastic factory sights might as well have been invisible. The next morning, I helped him install tritium night sights in my workshop. Twenty minutes of work potentially saved his life—and definitely improved his confidence. That’s when I realized how many people are running factory sights simply because they think installation requires a gunsmith.
Truth is, I’ve installed hundreds of pistol sights over the years—from quick field replacements in Afghanistan to precision competition setups for local shooters. Glock sights are among the easiest to swap, yet people pay $50-75 for “professional” installation of a task that takes twenty minutes with basic tools.
Let me walk you through the process that’s saved me and my clients thousands in gunsmith fees.
The Ten-Minute Overview
For those in a hurry, here’s the quick version:
- Safety clear the pistol (three-check method)
- Field strip to remove slide
- Remove front sight with 3/16″ nut driver
- Drift out rear sight with punch or pusher
- Install new front sight (hand tight plus 1/4 turn)
- Drift in new rear sight (centered and flush)
- Reassemble and function check
- Zero at 25 yards
That’s the basics. But the details determine whether you get it right the first time or end up at the gunsmith anyway.
Why Factory Glock Sights Need Replacing
The Plastic Problem
Glock’s factory sights are polymer. In Austrian German, they call them “Visierung”—literally “aiming device.” That’s all they are—minimal aiming devices that meet the basic requirement of having sights.
I’ve seen factory Glock sights:
- Melt from a hot barrel after extended shooting
- Break off when dropped on concrete
- Become invisible in low light
- Drift out of zero from holster wear
They’re placeholder sights, designed to be replaced. Gaston Glock himself has said as much. Yet I meet shooters who’ve carried the same factory sights for years, trusting their lives to plastic that costs Glock about $0.50 to produce.
When to Upgrade
Replace your sights if:
- You can’t see them clearly in low light
- They’ve shifted or loosened
- You carry for defense (no exceptions)
- You shoot competitively
- The plastic shows any wear or damage
Basically, if you’re reading this, you need new sights.
Tools: What You Actually Need
Essential Tools
Front Sight Tool:
- Best: Glock factory front sight tool
- Alternative: 3/16″ nut driver
- Field expedient: 3/16″ socket with extension
Rear Sight Tool:
- Best: MGW Sight Pro Universal
- Good: NcSTAR pusher
- Budget: Brass punch and hammer
- Emergency: Hardwood dowel and patience
Support Equipment:
- Padded vise or cradle
- Blue painter’s tape (protects finish)
- Gun oil or grease (installation lubricant)
- Microfiber cloth
- Good lighting (seriously, this matters)
My Workshop Setup
After years of installations, here’s what lives on my bench:
- MGW Sight Pro: Yes, it’s expensive. But I’ve installed 300+ sight sets with zero slide damage. Pays for itself if you help friends.
- Glock Armorer’s Tool: The factory 3/16″ tool with the perfect length and grip.
- Plastic Drift Set: Prevents marring when things get stubborn.
- Digital Calipers: For centering rear sights precisely.
Step-by-Step: The Right Way
Step 1: Safety Protocol (Non-Negotiable)
I don’t care if you “just checked it.” Follow this every time:
- Drop the magazine (put it in another room)
- Lock slide back and visually inspect chamber
- Finger sweep the chamber
- Look again (seriously)
- Release slide, point in safe direction, pull trigger
- Repeat visual inspection one more time
In Afghanistan, we called this “clearing to the point of paranoia.” It’s saved lives.
Step 2: Field Strip the Glock
Glocks strip easier than any pistol I know:
- Point in safe direction, pull trigger to release striker
- Pull slide back approximately 1/8 inch
- Pull down both sides of slide lock lever simultaneously
- Push slide forward off frame
- Remove recoil spring and barrel (set aside safely)
You now have a bare slide to work with. The frame goes in the safe—we don’t need it.
Step 3: Remove Factory Front Sight
The front sight looks permanent but isn’t:
- Flip slide upside down (protect top with tape)
- Locate hex screw in front sight post hole
- Insert 3/16″ tool (should fit snugly)
- Turn counterclockwise (lefty-loosey)
- Count rotations (usually 3-4 full turns)
- Lift out sight once screw is fully retracted
Common mistake: Over-loosening and dropping the screw inside the slide. Stop when you feel no resistance.
Step 4: Remove Factory Rear Sight
This is where people damage slides. Be patient:
- Secure slide in padded vise (or wrap in leather)
- Note drift direction (Glocks drift left to right, facing rear)
- Apply penetrating oil to dovetail (let sit 2 minutes)
- Position punch on LEFT side of sight
- Tap firmly but controlled (not hammering)
- Work incrementally (tap, check, tap, check)
If using a sight pusher, this becomes:
- Mount slide in pusher
- Turn adjustment screw slowly
- Watch for movement
- Continue until sight clears dovetail
Step 5: Prep for New Sights
Before installing anything:
- Clean dovetail thoroughly (no oil or debris)
- Test fit rear sight (should require pressure)
- Check front sight screw length against new sight
- Degrease all contact surfaces
- Apply tiny drop of blue Loctite to front screw (optional)
Step 6: Install New Front Sight
Precision matters here:
- Align sight perpendicular to slide
- Insert screw through bottom
- Hand tighten until sight seats fully
- Check alignment (must be perfectly straight)
- Final tighten 1/4 turn past hand tight
- Verify sight doesn’t wiggle
Over-tightening strips threads or cracks sights. Under-tightening means losing your front sight during shooting. Find the sweet spot.
Step 7: Install New Rear Sight
The critical step:
With Sight Pusher:
- Start sight in dovetail by hand
- Mount slide in pusher
- Slowly push sight to center
- Measure with calipers (equal distance each side)
- Test fit in holster
With Punch and Hammer:
- Start sight in dovetail (right side, facing rear)
- Support slide solidly
- Use brass punch only (steel damages sights)
- Tap in small increments
- Constantly check centering
- Final position should be flush and centered
Pro tip: If sight is too tight, remove and lightly sand dovetail bottom with 600-grit paper. If too loose, use purple Loctite or sight adhesive.
Step 8: Reassemble and Function Check
Put it back together:
- Replace barrel and recoil spring in slide
- Align slide with frame rails
- Pull slide back slightly while lowering onto frame
- Release forward until it locks
- Function check: Rack slide, dry fire, safety check
If something feels wrong, stop and diagnose. Don’t force anything.
Zeroing Your New Sights
The 25-Yard Standard
New sights rarely shoot to point of aim immediately. Here’s my zeroing process:
- Start at 7 yards (verify you’re on paper)
- Move to 15 yards (rough adjustments)
- Fine tune at 25 yards (final zero)
Adjustment Rules
Remember this mantra: “Move rear sight in direction of desired impact”
- Shooting left? Move rear sight right
- Shooting low? Need taller front or shorter rear
Most adjustments are tiny—we’re talking 1/32″ movements affecting point of impact by inches at 25 yards.
My Zeroing Target
I use a 3″ orange dot at 25 yards. Why?
- High visibility
- Approximate center mass size
- Clear aiming point
- Easy to see impacts
Fire 5-round groups, adjust, repeat. When you can keep all shots in the dot, you’re zeroed.
Sight Selection: What Actually Works
For Concealed Carry
Trijicon HD XR: Tritium plus photo-luminescent outline. Visible in all conditions. Narrow front post for precision. My daily carry choice.

- Condition: New
- Color: Orange
- Gun Type: Pistol
- Gun Make: Glock
- Fabric/Material: Metal
For Duty/Service
Ameriglo Bold: Large, highly visible. Tritium inserts. Wide rear notch for stress shooting. What I recommend to law enforcement.

- Great Product
For Competition
Dawson Precision: Fiber optic front, adjustable rear. Bright daylight visibility. Precise sight picture.
Budget Option
TruGlo TFX: Tritium plus fiber optic. Good all-around sight. Reliable construction.

- DAY & NIGHT SIGHT – Upgrade your handgun with the Truglo TFX PRO Sight, specially designed for professional shooters; This Glowing Gun Sight combines a fiber-optic and a tritium vial in a patented capsule, providing ultimate reliability and accuracy
For Aging Eyes
XS Big Dot: Massive front dot. Express-style rear. Fast acquisition. Adequate precision to 25 yards.
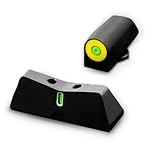
- Fits: Glock 17,19,19X,22,23,24,26,27,34,35,45,49 models including MOS versions & all generations. Tritium front & tritium rear set. Yellow Front Sight
Common Installation Mistakes
Mistake 1: Using Steel Punches on Sights
Steel on steel means damaged sights or slide. Always use brass or plastic for direct sight contact. I’ve seen $150 sights ruined by a steel punch.
Mistake 2: Forcing Misaligned Parts
If it requires excessive force, something’s wrong. Stop, diagnose, proceed. Forcing things breaks expensive parts.
Mistake 3: Inadequate Slide Support
Unsupported slides bend or crack under hammering. Always support directly under the working area.
Mistake 4: Not Testing Fitment
Always test holster fit after installation. Some sights (especially suppressor-height) may require holster modification.
Mistake 5: Skipping Function Checks
New sights can interfere with slide operation if incorrectly installed. Always fully function test before considering the job complete.
Field Expedient Methods
Emergency Front Sight Removal
Lost your tool? Use a cut-down Allen key or modified drill bit. File to 3/16″ hex shape. Works in a pinch.
No Sight Pusher Method
Sandwich slide between two wood blocks in vise. Use hardwood dowel and hammer. Slower but effective. This is how we did it in Afghanistan with limited tools.
The Freezer Trick
For stubborn rear sights: Freeze slide for 2 hours, heat sight with hair dryer. Thermal expansion difference helps installation. Old gunsmith trick that actually works.
Cost Analysis
DIY Installation:
- Tools (one-time): $50-200
- Time: 20-30 minutes
- Cost per installation: $0
Gunsmith Installation:
- Labor: $50-75
- Time: 1-3 days wait
- Risk: Trusting stranger with your gun
After installing sights on three pistols, you’ve paid for the tools. I’ve saved approximately $5,000 in installation fees over the years—money better spent on ammunition and training.
Maintenance After Installation
Your new sights need minimal care:
- Check tightness monthly (especially front sight)
- Clean tritium vials with alcohol (oils dim them)
- Touch up with sight paint if needed
- Verify zero every 500 rounds or after drops
- Replace tritium sights every 10-12 years (half-life decay)
When to Call a Professional
Swallow your pride and get help if:
- You’ve damaged slide or sights attempting installation
- Sights won’t stay zeroed after proper installation
- You lack proper tools and can’t justify buying them
- You’re installing adjustable target sights (require precision)
- It’s a valuable or collectible pistol
The Bottom Line
Installing Glock sights is a basic skill every serious shooter should possess. With $50 in tools and 30 minutes of time, you can upgrade from dangerous factory sights to professional-grade alternatives.
Don’t trust your life to polymer sights designed as placeholders. Upgrade them, install them correctly, and zero them properly. Your accuracy—and potentially your life—depends on it.
Remember: Good sights don’t make you a better shooter, but bad sights will definitely make you worse.
Practice makes permanent, so practice it right.
Aim true,
Flint Marshall
Northern Montana
Questions about specific sight recommendations or installation challenges? Need advice on sight selection for your application? Drop a comment below or visit Moosir.com for more practical firearms wisdom. Remember—respect the tool, respect the craft, respect yourself.