Two Octobers ago, I watched a hunter from Texas miss a standing broadside elk at 150 yards—not once, but three times. Good rest, no wind, calm animal. When we checked his rifle afterward, it was hitting eighteen inches left and two feet low at 100 yards. He’d driven 1,800 miles, spent thousands on the hunt, and never verified his zero after the trip. That magnificent bull walked away because of fifteen minutes of neglected preparation.
In my twenty-five years of guiding and instructing, I’ve seen more hunts ruined by improper zeroing than any other single factor. Bad zeros have cost hunters everything from meat for the winter to once-in-a-lifetime trophies. The good news? Zeroing a rifle scope properly is a straightforward skill anyone can master with the right approach and a little patience.
Whether you’re preparing for your first hunt or troubleshooting persistent accuracy problems, this guide will walk you through my field-proven zeroing process—the same method I’ve taught to hundreds of successful hunters and used on every rifle from military precision guns to beat-up ranch trucks.
Understanding Your Scope’s Adjustment System
Before you send a single round downrange, you need to understand what those turrets actually do. I’ve met experienced hunters who still spin knobs hopefully rather than deliberately because nobody ever explained the mechanical relationship between adjustments and impact.
The Elevation Turret: Your Vertical Control
That top turret controls where your bullets hit vertically. Think of it as a precision elevator for your point of impact. During my Ranger training, instructors drilled this into us until adjustments became instinctive: turn the elevation turret in the direction you want your impacts to move.
Most American hunting scopes adjust in quarter-MOA increments—that’s roughly quarter-inch at 100 yards. Some tactical and long-range scopes use MIL adjustments instead, with each click moving impact about 0.36 inches at 100 yards. Know your system before you start.
Here’s the critical part many folks get backward: if you’re shooting low, you turn the turret UP (usually counterclockwise when viewing from above). This raises your point of impact to meet your point of aim. Shooting high? Turn it DOWN (clockwise) to lower impacts.
I keep it simple by thinking of the turret as a screw—unscrew it (counterclockwise) to raise it up, screw it in (clockwise) to lower it down. This mental model has never failed me from Alaska to Afghanistan.
The Windage Turret: Controlling Horizontal Impact
Your side turret manages left and right adjustments. The principle mirrors elevation—turn the turret in the direction you want bullets to move. Hitting left of center? Turn the windage turret RIGHT. Impacting right? Adjust LEFT.
During a particularly frustrating zeroing session years back, I watched a fellow continuously adjust the wrong direction, chasing his impacts around the target for an hour. He’d never grasped that the turret moves impacts, not the reticle appearance. Once I explained the relationship, he zeroed in three shots.
Most windage turrets are clearly marked with “L” and “R” arrows. Follow them religiously. If your scope lacks clear markings, remember that turning the turret clockwise (when viewing from behind the rifle) typically moves impacts right.
Additional Adjustments Worth Understanding
While elevation and windage are essential for zeroing, understanding your scope’s other features helps optimize performance:
Parallax adjustment won’t affect your zero directly but can impact accuracy if ignored. On scopes with parallax adjustment (usually a side turret or adjustable objective), set it to your zeroing distance for the clearest image and most consistent accuracy.
Magnification settings matter more than most realize. I zero at the magnification I’ll use most commonly while hunting. For variables, that’s usually around 6x—enough magnification for precision without excessive wobble or reduced field of view.
Focus rings and diopter adjustments ensure your reticle appears sharp. A blurry reticle makes precise zeroing impossible. Before zeroing, point at a blank sky and adjust the eyepiece until the reticle appears perfectly crisp.
Illumination controls on scopes with lighted reticles should be set to the minimum brightness needed for visibility. Too bright, and the dot or crosshair blooms, reducing precision.
Choosing Your Zero Distance: The Foundation of Field Accuracy
The endless debate about “best” zero distance misses the point—the best zero is one that matches your hunting reality. After zeroing thousands of rifles for different applications, I’ve learned that understanding trajectory trumps following arbitrary recommendations.
The Practical 100-Yard Zero
For most hunters in most situations, a 100-yard zero provides maximum simplicity. Your bullet impacts exactly where you aim at 100 yards, shoots about 2 inches high at 200 yards (depending on caliber), and drops predictably beyond that.
This zero shines for timber hunting where most shots occur inside 150 yards. It’s also ideal for new shooters learning trajectory basics—the math is simple, the holds are minimal, and mistakes are forgiving.
I used a 100-yard zero exclusively during my first decade of hunting Montana’s thick forests. When shots rarely exceeded 200 yards, why complicate things? Place crosshairs on vitals and squeeze.
The Versatile 200-Yard Zero
My personal favorite for general Western hunting is a 200-yard zero. With most hunting cartridges, this puts you about 1.5 to 2 inches high at 100 yards and allows point-blank shooting from muzzle to 250 yards on deer-sized game.
This zero evolved from guiding in varied terrain where shots might come at 50 yards in timber or 300 yards across canyons. Rather than thinking about holdover inside 250 yards, I can focus on wind reading, shooting position, and shot placement.
Sarah has used a 200-yard zero on her .270 for fifteen years with excellent results. From pronghorn on the prairie to black bears in thick cover, that zero handles it all without mental gymnastics during critical moments.
Maximum Point Blank Range Zeroing
For dedicated open-country rifles, I calculate Maximum Point Blank Range (MPBR) for the game being hunted. This mathematical approach determines the zero distance that keeps your bullet within the vital zone for the maximum distance without holdover.
For elk with an 8-inch vital zone, MPBR with most magnums puts your zero around 275-300 yards. You’ll hit 3-4 inches high at 150 yards but stay within that 8-inch circle out to 350 yards or beyond.
This system requires understanding your specific load’s trajectory and committing to one primary game animal. It’s perfect for dedicated antelope or sheep rifles but less ideal for versatile guns used on everything from coyotes to elk.
The 36-Yard AR Zero
For AR-platform rifles, particularly those used for both close-range and moderate-distance shooting, the 36-yard zero offers unique advantages. This creates dual intersection points—your bullet crosses line of sight at 36 yards and again around 300 yards.
Between these distances, the bullet never rises or falls more than about 2 inches from your point of aim. For defensive carbines or ranch rifles handling everything from pest control to deer hunting, this trajectory curve proves remarkably practical.
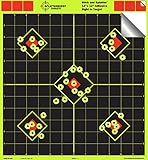
- Instantly see your SHOTS BURST BRIGHT FLUORESCENT YELLOW upon impact, spend more time shooting and less time checking your target.

- MULTI-USE Designed to create a solid and steady platform when aiming your rifle. Supports almost any rifle or shotgun type and gives everything you need for solid, wobble free shooting, especially at the range.

- 8x magnification & 42mm objective lenses, these Crossfire HD binos are optimized with select glass elements to deliver exceptional resolution, cut chromatic aberration and provide outstanding color fidelity, edge-to-edge sharpness and light transmission.
- 25-75x zoom: SV28 spotting scope is easy to focus and change magnification; easily set up when looking at birds and scenery; a great spotting scope for beginner to novice
My Field-Proven Zeroing Process
After helping hundreds of hunters zero rifles under every conceivable condition, I’ve refined a systematic process that works whether you’re at a formal range or using a ranch road backstop. This method saves ammunition, reduces frustration, and delivers consistent results.
Step 1: Preparation and Setup
Start with a clean, cool barrel. Those first shots from a clean barrel might impact slightly different from subsequent rounds, but consistency matters more than absolute precision during initial zeroing. Fire one or two fouling shots if you’re obsessive about it, but don’t overtheat the barrel before you begin.
Mount your target at exactly your intended zero distance. Use a rangefinder or measure it properly—guessing distances leads to mystery zeros that fail in the field. I learned this lesson embarrassingly late in my career when a “100-yard” zero turned out to be 85 yards, explaining my consistent high impacts at actual distance.
Choose high-visibility targets with clear aiming points. Those shoot-n-see style targets that show impacts in fluorescent colors save walking downrange constantly. Grid patterns help measure adjustment needs precisely.
Step 2: Establishing a Stable Platform
Your rifle must be rock-solid stable for accurate zeroing. Bench shooting with proper bags provides the best platform, but field expedient methods work when necessary.
At my range, I use a concrete bench with both front and rear bags. The front bag supports the forestock (never the barrel), while the rear bag cradles the buttstock’s toe. This setup eliminates human wobble from the equation.
In the field, I’ve zeroed off truck hoods, fence posts, and packed backpacks. The key is consistency—use the same rest position for every shot. Any change in rest position can shift impact, confusing your zero process.
Here’s a technique my grandfather taught me that still works: build your position so the rifle naturally points at target center without muscle input. If you have to force the rifle on target, readjust your support until it sits naturally. This eliminates tension that causes inconsistency.
Step 3: The Initial Shot
Dry fire once to verify your trigger control and natural point of aim. The crosshairs should barely move when the firing pin drops. If they jump, adjust your position until movement minimizes.
For your first live round, focus entirely on fundamentals: steady position, respiratory pause at natural exhale, smooth straight-back trigger squeeze, and follow-through holding the trigger back momentarily. This shot establishes your baseline.
Don’t adjust anything after one shot unless you’re completely off paper. Fire a three-shot group, allowing the barrel to cool between shots. Hot barrels walk impacts, giving false information about true zero.
Step 4: Reading Your Group
Those three shots tell you everything needed for intelligent adjustments. First, evaluate group size—if shots are scattered beyond 3 inches at 100 yards, something besides zero needs attention. Check scope mount tightness, verify your technique, or consider ammunition issues.
For acceptable groups, calculate the center point. This represents your rifle’s actual point of impact versus point of aim. Measure both vertical and horizontal distances from your aiming point to group center.
Convert measurements to clicks using your scope’s adjustment values. For quarter-MOA scopes at 100 yards, every inch equals four clicks. At 50 yards, it’s eight clicks per inch. At 200 yards, it’s two clicks. Write this down if necessary—precision beats guessing.
Step 5: Making Adjustments
Here’s where many shooters create problems through impatience. Make deliberate, calculated adjustments based on actual measurements, not estimates.
If your group centers 3 inches low and 2 inches right at 100 yards, you need 12 clicks UP on elevation and 8 clicks LEFT on windage (assuming quarter-MOA adjustments). Make these adjustments confidently in one movement rather than creeping toward zero through multiple groups.
After adjusting, fire another three-shot group. This should put you very close to zero. Fine-tune if necessary, but resist the urge to chase single shots around the target. Groups tell truth; individual shots can lie.
Step 6: Confirmation
Once centered at your zero distance, confirm with a five-shot group. This larger sample size reveals true accuracy potential and verifies your zero’s reliability. All five shots should cluster within your rifle’s accuracy capability.
Now test at different distances to understand your trajectory. If zeroed at 100 yards, shoot at 200 and 300 yards, noting exact impacts. This real-world data beats ballistic charts every time.
Document everything in a data book: date, temperature, altitude, ammunition lot number, and exact zero details. This information proves invaluable for maintaining zero across seasons and years.
Environmental Factors and Field Zeros
Perfect range zeros don’t always translate to field accuracy. Understanding how environmental conditions affect point of impact separates successful hunters from those making excuses about mysterious misses.
Temperature Effects
Powder burns differently at temperature extremes, changing velocity and therefore trajectory. My lightweight .30-06 shoots 2 inches different at 100 yards between Montana’s November cold and August heat.
I maintain separate zeros for hunting season temperatures versus summer practice sessions. That rifle zeroed in July might shoot significantly different when November arrives. Always verify zero in conditions matching your hunt.
Cold bore shots often differ from warm bore impacts. That first shot from a cold, clean barrel—the one that counts on game—might hit differently than your third shot at the range. Always note cold bore impact during zeroing sessions.
Altitude Adjustments
Thinner air at elevation reduces drag, allowing bullets to maintain velocity longer. A rifle zeroed at sea level will shoot higher at 8,000 feet—sometimes dramatically so with high-BC bullets.
When guiding hunters from low elevations, I insist on re-zeroing after arrival. That perfect Texas zero might be 4 inches high in Montana’s mountains. The half-hour spent verifying zero prevents wounded game and missed opportunities.
Ammunition Variables
Different loads impact differently, even with identical bullet weights. Federal’s 180-grain might hit 3 inches from Remington’s 180-grain at 100 yards. Premium ammunition usually shows better consistency, but always verify impact with your specific load.
Buy hunting ammunition in bulk from the same lot number when possible. This maintains consistency across practice and hunting seasons. Nothing frustrates more than achieving perfect zero with ammunition you can’t find again.
Troubleshooting Common Zeroing Problems
When zeroing goes wrong, systematic diagnosis beats random adjustments. Here are solutions to problems I encounter most frequently:
Can’t Get On Paper
If you’re missing the target entirely at 25 yards, something’s seriously wrong. First, verify the scope is mounted correctly—I’ve seen them installed backward more than once. Check that rings aren’t crushing the scope tube, preventing adjustment.
Bore sight to get close. For bolt actions, remove the bolt and look through the bore at your target. Adjust the scope to match without moving the rifle. This should put you on paper at 25 yards.
Consider mechanical offset with high-mounted scopes or rail systems. Your scope might sit 3 inches above the bore, requiring significant adjustment to converge at close range.
Scope Won’t Hold Zero
Shifting zeros usually indicate mounting problems before scope failure. Check all screws with proper inch-pound torque specifications. Mark witness lines with nail polish to detect movement.
Cheap rings cause more problems than cheap scopes. Quality steel rings properly torqued rarely fail. Those $20 department store rings? They’re usually the culprit when zero walks mysteriously.
If mounting hardware is solid, test the scope’s tracking. Shoot a group, dial up 20 MOA, shoot another group. Measure the distance—it should match exactly. If not, the scope needs service or replacement.
Groups Won’t Tighten
Large groups despite perfect technique indicate ammunition, barrel, or bedding issues rather than zero problems. Try different ammunition brands and bullet weights. Some rifles show strong preferences.
Check action screw torque and barrel free-float (if applicable). Stocks touching barrels inconsistently cause mysterious flyers. Dollar bill should slide freely between barrel and stock from action to muzzle.
Copper fouling destroys accuracy in some barrels. If groups open progressively during shooting sessions, aggressive copper removal might restore accuracy.
Different Shooting Positions Shift Impact
If your zero changes between bench and field positions, you’re introducing mechanical inconsistency. Usually this means you’re torquing the rifle differently or your sling is pulling the barrel.
Practice natural point of aim from all positions. Your body should support the rifle without muscle tension. If you’re forcing crosshairs on target, impacts will shift when that pressure changes.
Consider a lower-magnification zero if wobble makes consistent aiming difficult from field positions. Better to have a slightly larger, steady sight picture than a precise but dancing reticle.
Field Verification: The Critical Final Step
Range perfection means nothing if your zero fails in hunting conditions. Every rifle I hunt with gets field verification before season—shooting from positions I’ll actually use when it counts.
Positional Testing
After achieving bench zero, shoot from sitting, kneeling, and offhand positions. Impacts might shift slightly, but you need to know by how much. This isn’t about adjusting zero but understanding your capabilities.
Use available rests like you would while hunting—tree branches, fence posts, backpacks. That perfect bench zero might be 3 inches different when shooting off shooting sticks. Knowledge prevents misses.
Practice with your actual hunting clothing. That bulky jacket changes your mount, potentially shifting impact. Better to discover this at the range than when facing the buck of a lifetime.
Cold Bore Confirmation
Track where that first shot from a cold, clean barrel hits versus your warm barrel zero. On several rifles, I hold slightly different for known cold bore impact shift on first-shot opportunities.
Before each hunting season, I fire one shot daily for a week from a cold barrel, recording impacts. This data reveals true cold bore performance—the shot that matters most on game.
Environmental Testing
If possible, verify zero at different temperatures and elevations you’ll hunt. My mountain rifle wears different zeros for September archery versus late November rifle season—same scope, same ammunition, different air density and temperature.
Wind practice reveals how much drift affects your setup. Those calm range days don’t prepare you for Montana’s sideways wind. Know your holds for 10, 20, and 30 mph crosswinds at various distances.
The Mental Side: Building Confidence Through Repetition
Technical perfection means nothing without confidence. A properly zeroed rifle you don’t trust shoots no better than iron sights you believe in completely.
Repetition builds faith in your zero. Every time you verify that zero holds true, confidence grows. That’s why I check zero before every hunt, even if the rifle hasn’t moved from the safe. The mental confirmation is worth the ammunition cost.
Document your zeros obsessively. When you know that rifle has maintained the same zero through fifty range sessions, you stop wondering about equipment and focus on the shot.
Practice the zeroing process until it becomes routine. When you can zero any rifle efficiently without stress, field adjustments become manageable rather than mysterious.
Equipment Selection for Reliable Zeros
Quality equipment isn’t about price tags but appropriate selection for your application. A reliable zero starts with compatible components properly assembled.
Scope Selection
Choose scopes with positive, repeatable adjustments. Mushy turrets that don’t click definitively make precise zeroing frustrating. Quality doesn’t require spending thousands—many affordable scopes track reliably.
Match scope capability to rifle purpose. That 34mm tactical scope might track perfectly, but it’s unnecessary weight on a mountain rifle. Conversely, an ultralight hunting scope might not survive heavy-recoiling magnums.
Mounting Systems
Invest in quality rings and bases. This is not where to save money. Steel rings from reputable manufacturers, properly installed with correct torque values, rarely fail.
Consider one-piece rails for ultimate stability. The additional contact area and multiple mounting points eliminate potential flex points. For hard-recoiling rifles or precision applications, one-piece mounting systems provide peace of mind.
Lap scope rings when precision matters. Misaligned rings stress scope tubes, potentially affecting tracking. Thirty minutes with lapping compound ensures perfect alignment.
Support Equipment
Quality bags or bipods make zeroing easier and more consistent. Consistency matters more than absolute stability—use the same rest system for zeroing that you’ll use for hunting practice.
Invest in proper tools: inch-pound torque wrench, good screwdrivers or Allen wrenches, and level systems. Guessing torque values or using worn tools creates problems that manifest as “mysterious” zero shifts.
Maintaining Your Zero
A verified zero requires maintenance to remain reliable. Develop habits that preserve the zero you’ve worked to achieve.
Check action screws and mount tightness monthly during hunting season, annually during storage. Temperature cycles and recoil gradually loosen fasteners. Witness marks made with nail polish reveal any movement instantly.
Transport rifles carefully. More zeros are lost to truck rides than recoil. Quality cases prevent the bumps and impacts that shift zeros. At minimum, verify zero after any significant travel.
Clean appropriately for your rifle’s preferences. Some shoot best squeaky clean, others prefer fouled barrels. Learn your rifle’s personality and maintain accordingly. But always verify zero after aggressive cleaning.
Store rifles consistently. Leaning them in corners stresses scopes and stocks. Horizontal storage or muzzle-up in safes prevents wandering zeros from constant pressure.
The Bottom Line: Perfect Zeros Enable Ethical Shots
Every animal deserves our best effort at clean, ethical kills. That starts with absolute confidence in where our bullets will impact. A properly zeroed rifle removes equipment questions from the equation, letting us focus on shot selection and execution.
The process I’ve outlined isn’t the only way to zero a rifle, but it’s proven reliable through thousands of applications. From military qualifications to guided hunts to teaching my own children, this systematic approach delivers consistent results.
Remember that zeroing is just the beginning. Regular practice from field positions, understanding trajectory at various distances, and maintaining equipment properly—these elements combine with a good zero to create genuine field accuracy.
Your zero is a promise to yourself and the game you pursue. It states that you’ve prepared properly, eliminated preventable variables, and committed to ethical shot placement. That’s a promise worth keeping through careful, methodical zeroing practices.
The wilderness doesn’t care about your equipment specifications or ballistic charts. It only respects competence demonstrated through preparation. Take time to zero properly, verify regularly, and practice constantly. Your freezer—and your conscience—will thank you.
Plan for the worst, hope for the best, and always remember: your best survival tool is the six inches between your ears, but a properly zeroed rifle sure helps when winter meat depends on making that one shot count.