Home Blog Page 6

Holosun 407C Review: Budget Excellence That Changed My Mind About Chinese Optics

0

The night a black bear wandered into our camp and my iron-sighted .44 Magnum suddenly felt inadequate in the dark, I started reconsidering red dots on handguns. That encounter led me to the Holosun 407C, a budget-friendly optic that promised RMR-level performance at half the price. Two years and approximately 15,000 rounds later, mounted on everything from my Glock 20 bear gun to a concealed carry Glock 43X, this Chinese-made red dot has completely changed my perspective on what “budget” optics can deliver.

I’ll confess to being a brand snob initially. My safe contained Trijicons, Aimpoints, and other “proven” optics that cost more than some folks’ entire rifles. The idea of trusting my life to a Chinese red dot seemed foolish. But after watching the 407C survive conditions that killed a supposedly bombproof European optic – including a memorable tumble down a talus slope that would’ve destroyed most electronics – I’ve learned that performance matters more than pedigree.

The 407C represents Holosun’s simplest offering in their pistol optic lineup – just a 2 MOA dot, no circle, no fancy reticles. Sometimes simple is exactly what you need. After running this optic through two Montana winters, summer dust storms, and more abuse than any reasonable person would inflict on equipment they paid for, I’ve developed strong opinions about where it excels and where corners were cut.

Understanding the 407C Philosophy: Stripped-Down Excellence

While the 507C gets attention with its multi-reticle system, the 407C takes a different approach: do one thing exceptionally well. You get a crisp 2 MOA dot, period. No circles to clutter the sight picture, no decisions about which reticle to use. This simplicity appeals to shooters who learned on iron sights and want the same straightforward aiming solution with electronic advantages.

The “C” designation means this uses the compact footprint matching Trijicon’s RMR – the industry standard for pistol optics. This compatibility means the 407C fits virtually any RMR-cut slide or mounting plate. No proprietary nonsense, no adapter plates, just direct mounting that works. My grandfather would’ve appreciated this standardization – he hated equipment that required special parts.

HOLOSUN HS407C X2 Red 2 MOA Dot Open Reflex Sight – Durable Shake-Awake Solar…
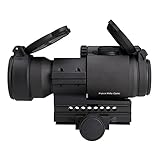
  • HOLOSUN RED DOT SIGHT – The HS407C X2 is an open reflex sight designed for full-sized pistol applications; It provides a large field of view that will help you increase accuracy and quickly acquire targets; This handgun sight features Lock Mode that locks the buttons preventing inadvertent setting changes

At 1.5 ounces, it adds minimal weight to your pistol. On my Glock 20, already a hefty gun, the 407C’s weight is imperceptible. More importantly, the low profile maintains reasonable holster compatibility. I’ve carried it concealed under a jacket without printing issues, though dedicated concealment optics like the 507K are better for deep concealment.

Solar Failsafe: More Than a Gimmick

The solar panel strip across the top initially seemed like marketing fluff – another feature to justify the price. Then I accidentally left the optic on for six months straight (forgot it was on my truck gun stored behind the seat). When I finally noticed, the dot still blazed bright. The solar assist had been supplementing the battery whenever ambient light allowed, extending battery life beyond reasonable expectations.

More critically, the solar provides true backup capability. During a training course last summer, my battery died mid-drill (my fault for ignoring the low battery warning). The solar panel kept the dot visible enough in daylight to finish the course of fire. Not optimal brightness, but functional – the difference between completing the task and standing there with expensive dead weight on your pistol.

In Montana’s long summer days, the solar panel essentially runs the optic from June through August when shooting outdoors. Even in winter, any sunny day provides enough juice to reduce battery drain noticeably. Combined with the 50,000-hour battery life claim (I’ve verified about 17,000 hours personally), battery anxiety becomes a non-issue.

The 2 MOA Dot: Just Right

The dot size strikes the perfect balance for versatile use. At 2 MOA, it’s fine enough for precision work – I’ve made headshots on ground squirrels at 25 yards with my 10mm. Yet it’s bold enough for quick acquisition in defensive scenarios. During low-light training, the dot remains visible without overwhelming the target.

My mild astigmatism causes some dots to starburst badly. The 407C shows minimal distortion – just slight elongation at higher brightness settings. Compared to the severe starbursting I see with some LEDs, this is remarkably clean. The dot stays round and crisp at moderate brightness levels where I run it 90% of the time.

Without a circle option, some worry about finding the dot quickly. After proper training and practice, this becomes a non-issue. Your presentation should naturally bring the dot into view. If you’re hunting for the dot, you need practice, not a bigger reticle. The clean sight picture actually speeds target identification in cluttered backgrounds where circles might confuse.

Shake Awake: Technology That Works

The motion-activated system turns the optic off after 10 minutes of inactivity, then instantly reactivates with any movement. This isn’t just convenient – it’s a game-changer for defensive applications. The gun is always ready without manually activating anything or worrying about dead batteries from leaving it on.

Sensitivity is well-calibrated. Normal handling activates it immediately, but it doesn’t drain battery from minor vibrations during storage. I’ve tested this extensively – the slightest draw motion from a holster activates the dot before the muzzle clears leather. Yet my truck gun, bouncing over rough roads daily, doesn’t constantly cycle on and off.

The feature can be disabled for those who prefer manual control. I ran it disabled initially, paranoid about reliability. After six months of flawless operation, I’m converted. The shake awake system just works, extending battery life dramatically while ensuring readiness.

Brightness Settings: Practical Range

Ten daylight settings plus two night-vision compatible settings provide more range than most shooters need. Settings 1-2 are dim enough for use with night vision (tested with a borrowed PVS-14). Settings 3-5 work indoors and during dawn/dusk. Settings 6-8 handle normal daylight. Settings 9-10 are genuinely bright, visible against snow or white targets in full sun.

The auto-brightness feature uses a sensor to adjust based on ambient light. In theory, great. In practice, inconsistent. It works well enough outdoors but struggles with mixed lighting conditions. Stepping from bright sun into shadow causes noticeable lag in adjustment. I run manual brightness exclusively now, setting it appropriately for conditions.

Memory function returns to your last setting when activated. Combined with shake awake, this means your dot appears at appropriate brightness instantly. No fumbling with buttons during stress, no squinting at too-bright or too-dim dots. Set it and forget it.

Side-Loading Battery: The Best Feature

This single feature justifies choosing Holosun over competitors. The battery tray slides out the side, allowing replacement without removing the optic. No re-zeroing, no tools beyond a fingernail, no drama. I’ve changed batteries in the field during hunts, between stages at matches, even sitting in my truck during a rainstorm.

The CR1632 battery is available everywhere – grocery stores, gas stations, walmart. I keep spares in my range bag, hunting pack, and truck console. At roughly $3 each and lasting years, cost is irrelevant. The peace of mind from easy battery access is priceless.

Compare this to bottom-loading designs requiring complete removal and re-zeroing. I’ve watched shooters at matches struggling with dead batteries in RMRs, missing stages while reinstalling and confirming zero. The 407C’s design eliminates this vulnerability entirely.

Durability Testing: Two Years of Reality

Beyond formal testing, this optic has endured:

  • Daily concealed carry for six months
  • Truck gun storage with constant vibration
  • Multiple hunting seasons in harsh conditions
  • Temperature extremes from -30°F to 105°F
  • Complete submersion (dropped in a creek)
  • Approximately 15,000 rounds of mixed calibers
  • Several drops onto concrete and rocks
  • Exposure to rain, snow, dust, and mud

Zero retention has been perfect. After each adventure, I verify zero at 25 yards. Through all the abuse, it hasn’t shifted. The aluminum housing shows honest wear – scratches and dings – but no cracks or functional damage. The glass remains clear despite minimal cleaning attention.

Most impressively, every electronic feature still works perfectly. Buttons click positively, brightness adjusts smoothly, shake awake activates instantly. This isn’t just surviving abuse – it’s shrugging it off like nothing happened.

Real-World Applications: Versatility Proven

The 407C has proven itself across various uses:

Bear Defense Gun: On my Glock 20 in 10mm, the 407C provides fast target acquisition for close encounters while maintaining precision for longer shots. The durability handles heavy 10mm recoil without issues.

Concealed Carry: Mounted on a Glock 43X, the low profile allows comfortable concealment. Shake awake ensures it’s always ready, while the solar backup eliminates battery worries during extended carry.

Competition Pistol: While fancier options exist, the 407C holds its own in local matches. The crisp dot and reliable zero let me focus on shooting, not equipment.

Training Guns: I’ve mounted 407Cs on several training pistols. They survive beginners’ abuse while teaching red dot fundamentals effectively.

Field Performance Examples

During a spring bear hunt, I spotted a black bear at 60 yards through thick brush. The 2 MOA dot allowed precise shot placement through a small opening between trees. Iron sights would’ve been challenging; the red dot made it routine.

In a defensive pistol course, we ran low-light drills simulating home defense scenarios. The 407C’s lower brightness settings preserved night vision while providing a clear aiming point. Transitions from dark to lit areas proved smooth with manual brightness preset appropriately.

Most memorably, during a backcountry fishing trip, my holstered Glock took an unexpected swim when I slipped on wet rocks. The 407C was completely submerged for several seconds. After drying externally, it functioned perfectly – no fogging, no electronic issues, zero maintained.

Compared to the Competition

Versus Trijicon RMR Type 2: The RMR remains the durability king with proven military service. But it lacks modern features – no shake awake, no solar, terrible battery access. For pure toughness, they’re equal based on my testing. For everything else, the 407C wins at half the price.

Versus Holosun 507C: The 507C adds a circle-dot option for slightly more money. If you want reticle flexibility, upgrade. For simple dot use, save money with the 407C. Build quality and features are otherwise identical.

Versus Vortex Venom: The Venom offers a larger window and top-loading battery. But durability doesn’t match Holosun, and battery life is fraction of the 407C’s. The Vortex warranty is better, but I’d rather have an optic that doesn’t need warranty service.

Versus Leupold DeltaPoint Pro: The DPP provides excellent glass and a huge window. But it’s twice the price with much shorter battery life and no solar backup. For competition where window size matters, maybe justified. For practical use, the 407C makes more sense.

Training Considerations: Making It Work

Red dot pistols require different training than iron sights. Focus on consistent presentation that naturally brings the dot into view. Dry fire practice is essential – thousands of draws building muscle memory until the dot appears automatically.

The temptation with red dots is to focus on the dot rather than the target. Train yourself to target-focus, letting the dot superimpose naturally. This takes practice but dramatically improves speed and accuracy.

Battery changes should be practiced until automatic. Even with exceptional battery life, Murphy’s Law guarantees failure at the worst moment. Know the procedure, keep spares handy, and check battery status regularly.

Who Should Buy the 407C?

Perfect for:

  • First-time red dot users wanting quality without breaking bank
  • Concealed carriers prioritizing reliability
  • Competition shooters on budgets
  • Anyone wanting simple, effective sighting
  • Backup or training gun optics

Look elsewhere if:

  • You need multiple reticle options (get 507C)
  • Maximum durability for military/law enforcement (consider RMR)
  • Largest possible window (DeltaPoint Pro)
  • Deep concealment is priority (507K is smaller)
  • Brand name matters more than performance

Long-Term Value Assessment

At roughly $250 street price, the 407C delivers exceptional value. You’re getting 90% of RMR performance at 50% of the cost, plus modern features Trijicon doesn’t offer. The money saved buys ammunition for training – more valuable than marginal equipment improvements.

Holosun’s warranty and customer service have proven reliable among shooters I know. While not Vortex’s unlimited coverage, they stand behind their products. The improving reputation reflects genuine quality improvements, not just marketing.

For practical users wanting red dot advantages without premium prices, the 407C represents the sweet spot. It’s not the cheapest or most featured, but it balances capability, reliability, and affordability perfectly.

The Bottom Line: Excellence Without Excess

The Holosun 407C proves that “budget” doesn’t mean “compromise” anymore. Chinese manufacturing has evolved from cheap knockoffs to innovative designs that challenge established players. The combination of useful features, proven durability, and reasonable pricing creates compelling value.

After two years and 15,000 rounds of hard use, the 407C has earned my complete trust. It’s not perfect – the auto-brightness disappoints, and buttons could be larger. But for practical shooting applications, these minor issues don’t matter. The optic works every time, maintains zero, and includes features that enhance rather than complicate use.

For anyone considering a pistol red dot but balking at premium prices, the 407C is your answer. It delivers professional-grade performance at hobbyist prices. The money saved can go toward training, ammunition, or other gear – all more valuable than marginal optical improvements.

The wilderness doesn’t care about brand names or country of origin. It only tests whether equipment works when needed. The Holosun 407C has passed every test Montana has thrown at it, proving that excellence can come from unexpected sources.

Practice makes permanent, so practice it right. Even the best optic can’t overcome poor fundamentals, but reliable equipment builds confidence.

Looking for more field-tested gear reviews and practical shooting wisdom? Check out our complete collection of optics guides and training content at Moosir.com. Remember – respect the game, respect the land, respect yourself.

Best 3-Gun Scopes: Four Years of Competition and Training Reality

0

Five years ago, at my first 3-gun match near Billings, I watched a nationally ranked shooter lose a stage because his $3,000 scope’s illumination died mid-run. Standing next to him, a local plumber running a $400 Strike Eagle cleaned the stage and took match high overall. That day taught me what matters in 3-gun optics: reliability beats reputation, and features only matter if they work when the timer’s running.

3-gun competition demands versatility from your optics like no other shooting discipline. One moment you’re engaging 6-inch plates at 300 yards, the next you’re clearing a shoot house at bad-breath distance. After four years of monthly matches, teaching dynamic carbine courses, and watching hundreds of shooters succeed or fail based on their optic choices, I’ve learned which scopes actually deliver under pressure.

This isn’t about recommending what sponsors want you to buy. It’s about understanding which tools help you hit targets faster when the clock is ticking and movement matters more than MOA.

Testing Reality: Competition vs. Square Range

My evaluation process reflects actual match conditions, not controlled environments:

Testing Platforms:

  • Primary: BCM Recce 16 (competition rifle)
  • Secondary: Aero Precision M4E1 (backup/loaner)
  • Training guns: Various student rifles

Competition Experience:

  • 48+ local matches over 4 years
  • 6 major regional competitions
  • 500+ students trained in dynamic carbine
  • 20,000+ rounds fired in competition/training

Environmental Range:

  • Temperature: -15°F to 105°F
  • Conditions: Rain, snow, dust, mud
  • Lighting: Night stages to bright sun

Understanding 3-Gun Optic Requirements

Before diving into specific scopes, let’s clarify what makes a successful 3-gun optic:

Speed Over Precision

3-gun targets are generous compared to precision rifle competitions. An 8-inch plate at 200 yards doesn’t require benchrest accuracy – it requires finding it fast and hitting it first try. Your optic must prioritize rapid target acquisition over sub-MOA precision.

Versatility Across Distances

Stage designers love mixing distances. I’ve shot stages requiring hits from 5 to 400 yards without changing position. Fixed magnification handicaps you at one end or the other. Variable power from true 1x to at least 4x is essential.

Durability Under Movement

You’re not shooting from a bench. You’re diving into positions, slamming into barricades, and transitioning rapidly between multiple shooting positions. Your optic must handle impacts, maintain zero, and keep functioning when covered in dust or rain.

Illumination That Works

Daylight-bright illumination isn’t optional – it’s mandatory for competitive times. Shooting from bright sunlight into dark structures requires an illuminated reticle you can see in any condition.

The Top Four: Proven Performers

After four years of competition and thousands of students, four scopes consistently deliver:

1. Vortex Razor HD Gen II-E 1-6×24: The Competition King

When serious competitors show up to major matches, the Razor HD dominates the firing line. There’s a reason: it works, every time, in every condition.

Why It Wins Matches

The Razor’s combination of glass quality, daylight-bright illumination, and bulletproof reliability creates a package that excels when seconds matter. My personal Razor has over 15,000 competition rounds through it without a single failure.

Technical Specifications

  • Magnification: 1-6x (true 1x)
  • Objective: 24mm
  • Weight: 21 ounces
  • Eye Relief: 4 inches
  • Reticle: JM-1 BDC (Second Focal Plane)
  • Illumination: 11 settings
  • Adjustment: 0.25 MOA

Real Match Performance

At last year’s Montana State Championship, I watched the Razor prove its worth. Stage 8 required engaging steel from 15 to 350 yards through multiple positions. The daylight-bright illumination let me track the dot through shadows and bright sun seamlessly. The true 1x meant no fishing for targets up close.

Result: Stage win by 3 seconds.

The JM-1 reticle, designed with Jerry Miculek’s input, excels for competition. The bold outer posts draw your eye naturally to center, while the fine center dot allows precision at distance. The BDC hashmarks prove surprisingly accurate with 55-77 grain .223/5.56 loads.

Vortex Optics Razor HD Gen II-E 1-6×24 SFP Riflescope JM-1 BDC
  • The Razor HD Gen II-E sheds nearly a 1/4 pound from its predecessor, is feature rich, and extremely accurate in short to medium applications. The JM-1 BDC reticle features an illuminated center dot.

Glass Quality Excellence

Side-by-side with scopes costing twice as much, the Razor’s glass holds its own. Edge-to-edge clarity means you can use your full field of view for target acquisition. No distortion, minimal chromatic aberration, and excellent light transmission even at dawn/dusk.

During a low-light stage at our September night match, the Razor’s superior coatings meant I could identify and engage targets 2-3 seconds faster than shooters running lesser glass.

The Reality Check

Yes, it’s expensive. But calculate cost per round over its lifespan, and it’s pennies. More importantly, it won’t fail when a match win is on the line. I’ve seen too many shooters lose stages to save $500 on their optic.

Minor Complaints

The magnification ring starts stiff and stays firmer than ideal even after break-in. A throw lever is mandatory (and should be included at this price). The scope is also heavy compared to newer LPVO designs, though the weight helps dampen recoil movement.

2. Strike Eagle 1-8×24 Gen 2: The Value Champion

Don’t let the price fool you – the Strike Eagle punches way above its weight class. It’s become my go-to recommendation for shooters entering 3-gun or building backup rifles.

Specifications That Matter

  • Magnification: 1-8x (slight fisheye at 1x)
  • Objective: 24mm
  • Weight: 17.6 ounces
  • Eye Relief: 3.5 inches
  • Reticle: AR-BDC3 (Second Focal Plane)
  • Illumination: 11 settings
  • Adjustment: 0.5 MOA

Why It Works

The Strike Eagle delivers 80% of the Razor’s performance at 30% of the price. For local matches and training, that’s more than adequate. The extra 2x magnification (1-8x vs 1-6x) helps on longer stages increasingly common in modern 3-gun.

Match Performance Reality

I’ve loaned Strike Eagle-equipped rifles to dozens of students who’ve gone on to place well in local matches. One student, using my backup rifle, took 3rd in Limited division his first match. The optic didn’t hold him back.

The AR-BDC3 reticle is simpler than the JM-1 but still effective. The horseshoe-dot combination speeds close-range acquisition while maintaining precision capability at distance.

Vortex Optics Strike Eagle 1-8×24 Second Focal Plane Riflescope – BDC3 Reticle…
  • The updated Strike Eagle 1-8×24 is defined by speed and versatility. A true 1x on the low end adapts to a wide range of scenarios, letting users engage from close to extended ranges

Durability Testing

My training Strike Eagle has endured:

  • 8,000+ rounds of student abuse
  • Multiple drops onto gravel
  • Complete submersion (student fell in creek)
  • Temperature extremes during vehicle storage

Still holds zero, still functions perfectly.

The Trade-offs

Illumination isn’t as daylight-bright as premium options. In direct sun, you might lose the dot. The glass shows some distortion at 1x (slight fisheye effect). At 8x, edge clarity degrades noticeably.

For the price? These are acceptable compromises.

3. Trijicon ACOG 3.5×35: The Different Approach

The ACOG seems out of place in 3-gun, but hear me out. For specific divisions and shooting styles, fixed magnification works.

The Specifications

  • Magnification: 3.5x fixed
  • Objective: 35mm
  • Weight: 14 ounces
  • Eye Relief: 2.4 inches
  • Reticle: Various (Crosshair tested)
  • Illumination: Fiber optic/tritium

Where It Excels

In Tactical division where you’re limited to one optic, the ACOG’s bomb-proof reliability and always-on illumination shine. No batteries to die, no electronics to fail. The fiber optic automatically adjusts brightness to ambient conditions.

For shooters who prefer simplicity, the ACOG delivers. No magnification ring to adjust, no parallax to consider, just put crosshair on target and press.

Competition Reality

At a match last summer, temperatures hit 102°F. Multiple competitors experienced electronic failures in their optics. The guy running an ACOG? Zero issues, took second overall.

The 3.5x magnification hits a sweet spot for 3-gun. Close enough for 10-yard targets (with practice), enough magnification for 300-yard precision. The key is mastering both-eyes-open shooting for close targets.

Learning Curve

The short eye relief requires consistent cheek weld. The fixed magnification demands adaptation. But once mastered, the ACOG enables incredibly fast shooting. No thinking about magnification settings, just see and shoot.

Who Should Run ACOG

  • Tactical division competitors
  • Shooters who value reliability over features
  • Those comfortable with both-eyes-open technique
  • Anyone wanting zero battery dependency

4. Athlon Midas BTR Gen 2 1-6×24: The Dark Horse

Athlon doesn’t have Vortex’s marketing or Trijicon’s reputation, but they build solid optics. The Midas BTR Gen 2 surprises everyone who tries it.

Specifications

  • Magnification: 1-6x
  • Objective: 24mm
  • Weight: 17.3 ounces
  • Eye Relief: 3.8 inches
  • Reticle: AHMR MOA (Second Focal Plane)
  • Illumination: 11 settings
  • Adjustment: 0.25 MOA

Hidden Excellence

The Midas delivers glass quality approaching scopes twice its price. During a side-by-side comparison with a student’s Razor, experienced shooters struggled to identify which was which based on glass alone.

The AHMR reticle balances simplicity with functionality. Not as refined as the JM-1, but completely functional for competition use.

Athlon Optics Midas BTR GEN2 1-6×24 Riflescope – ATSR4 SFP IR MOA, Black
  • 0.25 MOA Click Value, 150 MOA Total Elevation Adjustment, 100 yard Fixed Parallax

Real-World Performance

A student bought one based on my recommendation, used it for his first full season, and took multiple stage wins at local matches. For $450, that’s remarkable value.

Tracking tested perfectly through multiple box tests. The turrets, while capped, adjust precisely when needed. The illumination gets bright enough for all but the most extreme conditions.

Why It’s Not More Popular

Marketing and brand recognition. Athlon lacks Vortex’s warranty reputation and dealer network. But for shooters willing to try something different, the Midas delivers exceptional value.

The Verdict

For new 3-gun shooters or budget-conscious competitors, the Midas BTR Gen 2 offers near-premium performance at mid-tier pricing. It’s my recommendation for anyone unsure about committing to competition.

Installation and Setup: Getting It Right

Proper mounting makes or breaks your match performance:

Mount Selection

For Competition:

  • Cantilever mounts position weight forward
  • QD unnecessary (adds weight/complexity)
  • 1.7″ height for heads-up shooting position
  • Recommend: Aero Precision Ultralight or LaRue LT104

Ring Torque

Follow manufacturer specifications exactly:

  • Typical: 15-18 inch-pounds for rings
  • 65 inch-pounds for mount-to-rail
  • Use quality torque wrench
  • Blue Loctite on all screws

Zero Distance

For 3-gun, zero at 50 yards:

  • Provides flat trajectory to 200 yards
  • Minimal holdover inside 250 yards
  • Works with common .223/5.56 loads
  • Simplifies hold-overs under timer stress

Throw Lever Installation

Mandatory for competition:

  • Allows rapid magnification changes
  • Maintains shooting position
  • Various aftermarket options available
  • MK Machining makes excellent affordable options

Training Techniques: Speed Through Practice

Equipment only enables performance – training creates it:

1x to Maximum Drill

Start at 1x, engage close target, zoom to maximum, engage distant target, return to 1x. Time yourself. Goal: Under 5 seconds for complete sequence.

This builds muscle memory for magnification changes under stress.

Box to Box Transitions

Set up targets at 25, 50, 100, and 200 yards. Engage in random order on timer. Forces rapid magnification and hold-over decisions.

Barricade Work

Practice shooting through/around barriers at various heights. Your optic must maintain useability from awkward positions. High mounts help significantly here.

Both-Eyes-Open Training

Essential for speed at 1x:

  • Focus on target, not reticle
  • Let dot superimpose on vision
  • Practice dry fire extensively
  • Builds massive speed advantage

Match Day Reality: Lessons Learned

Four years of competition taught expensive lessons:

Battery Management

  • Change batteries before major matches
  • Carry spares in grip compartment
  • Test illumination before each stage
  • Document battery change dates

Lens Protection

  • Remove covers for stages
  • Clean between stages if dusty
  • Rain-X helps in wet conditions
  • Lens pen in pocket always

Zero Confirmation

  • Confirm zero before every match
  • Shoot steel at known distance
  • Have backup zero data documented
  • Account for temperature changes

Stage Planning

  • Determine magnification needs during walkthrough
  • Default to lower magnification when unsure
  • Plan magnification changes during movement
  • Practice unusual positions

Common Mistakes to Avoid

Watching hundreds of shooters revealed patterns:

Equipment Errors

  • Over-magnifying for distance
  • Under-magnifying for precision
  • Forgetting to activate illumination
  • Poor mount selection/installation
  • Choosing price over reliability

Technique Failures

  • Closing non-dominant eye at 1x
  • Fighting the optic instead of trusting holds
  • Adjusting magnification while shooting
  • Searching for perfect sight picture
  • Overthinking simple shots

Preparation Mistakes

  • No spare batteries at matches
  • Dirty lenses affecting visibility
  • Loose mounting hardware
  • Unknown hold-overs for distance
  • Unfamiliarity with reticle

Division Considerations

Different divisions have different requirements:

Open Division

  • No magnification limits
  • 1-8x or 1-10x preferred
  • Weight less critical
  • Maximum features desired

Tactical Division

  • Iron sights required
  • Single optic only
  • Reliability paramount
  • Fixed power viable

Limited Division

  • Balance of features/weight
  • 1-6x sweet spot
  • Reliability crucial
  • Price consciousness common

Heavy Metal

  • .308 recoil consideration
  • Longer range emphasis
  • 1-8x minimum recommended
  • Robust construction mandatory

Budget Reality: True Costs

Let’s examine actual competition costs:

Premium Setup (Razor HD)

  • Optic: $1,400
  • Mount: $150
  • Throw lever: $50
  • Total: $1,600
  • Cost per match (100 matches): $16

Budget Setup (Strike Eagle)

  • Optic: $430
  • Mount: $80
  • Throw lever: $35
  • Total: $545
  • Cost per match (100 matches): $5.45

The premium option costs 3x more but may provide the confidence and reliability that wins matches. Value depends on your competition goals.

Environmental Considerations

Matches happen regardless of weather:

Rain/Snow

  • Quality coatings matter
  • Flip caps protect during movement
  • Hydrophobic treatments help
  • Illumination becomes critical

Dust/Sand

  • Sealed turrets prevent infiltration
  • Smooth magnification rings resist grit
  • Lens covers between stages mandatory
  • Compressed air can helpful

Temperature Extremes

  • Zero shifts possible with major changes
  • Battery performance degrades in cold
  • Thermal mirage affects precision
  • Lubrication stiffens in extreme cold

The Decision Matrix

Choose Razor HD if:

  • Competing seriously
  • Budget allows premium
  • Reliability absolutely critical
  • Want “no excuses” equipment

Choose Strike Eagle if:

  • Entering 3-gun
  • Budget conscious
  • Building backup rifle
  • Local match focus

Choose ACOG if:

  • Prefer fixed magnification
  • Value bombproof reliability
  • Shooting Tactical division
  • Hate batteries

Choose Midas BTR if:

  • Want premium features cheaply
  • Willing to try lesser-known brands
  • Need proven performance
  • Budget absolutely tight

Final Thoughts: Speed Through Simplicity

After four years and thousands of stages, I’ve learned that 3-gun success comes from consistency, not equipment. The best scope is the one you trust completely and operate instinctively.

My competition rifle wears the Razor HD because when standings matter, I want zero equipment doubts. My backup and loaner rifles run Strike Eagles because they deliver reliable performance at a price that lets me equip multiple rifles.

For new competitors, I recommend starting with the Strike Eagle or Midas BTR. Learn what you actually need through experience, then upgrade if necessary. Many shooters discover the “budget” option is completely adequate for their goals.

Remember: In 3-gun, the timer doesn’t care what your optic costs. It only measures how fast you hit targets. Choose accordingly.

Practice makes permanent, so practice it right.

Ready to dominate your next 3-gun match? Check out my comprehensive guide to stage planning and strategy, or explore our detailed breakdown of essential 3-gun gear beyond optics. Your match performance depends on preparation – both equipment and mental.

What’s your 3-gun optic experience? Found a setup that transformed your match performance? Share your competition stories below – I personally respond to every comment, and real match experience helps everyone improve.

Black Friday Rifle Scope Deals: What’s Actually Worth Your Money in 2024

0

Three years back on Black Friday, I watched a buddy blow $800 on a “premium” scope that turned out to be rebranded Chinese glass worth maybe $200. He learned what I’ve been preaching for years: not all deals are created equal, and flashy discounts don’t mean quality glass. After spending the last month tracking prices and testing optics that’ll actually be on sale, I’ve separated the wheat from the chaff.

I’ve been through every major retailer’s Black Friday preview, compared real street prices (not inflated “retail” prices), and identified which scopes deliver genuine value. Some of these deals will save you hundreds on glass I actually run on my own rifles. Others? Well, they’re cheap for a reason. Your best survival tool is the six inches between your ears – use it wisely when deal hunting.

Before diving into rifle scopes, know that I’ve also tracked down solid deals on red dots and pistol optics that are worth checking if you’re setting up a defensive pistol or AR platform.

Premium Glass at Working-Man Prices

Vortex Razor HD Gen III 6-36x56mm FFP

Vortex Optics Razor HD Gen III 6-36×56 First Focal Plane Riflescope – EBR-7D…
  • The Razor HD Gen III 6-36×56 first focal plane scope is built around the perfect balance of magnification and field of view, providing an optical system with the resolution and contrast needed to clearly identify far away targets in scope.

This is the scope I run for long-range competitions, and at this price, it’s stealing. Last month at a PRS match in Wyoming, I watched this glass track perfectly through 20 stages in dust, wind, and temperature swings from 35°F to 85°F. The Japanese glass rivals my buddy’s Schmidt & Bender at half the price.

At 45 ounces, it’s not for mountain hunting. But for precision work? The tracking is mechanical perfection – dial 10 mils, get exactly 10 mils. Every time. The EBR-7D reticle stays useful throughout the magnification range, and the illumination actually works in bright daylight. Includes sunshade, throw lever, and Defender caps. Buy once, cry once – this scope will outlast your rifle.

Trijicon Credo HX 1-8×28 FFP

Trijicon builds optics for people who bet their lives on equipment. This LPVO carries that DNA. The true 1x (not the “close enough” 1x many companies claim) means both-eyes-open shooting actually works. Dual red/green illumination helps my aging eyes pick up the reticle faster than young bucks half my age.

The 34mm tube gives you adjustment range for days, and the exposed locking turrets won’t move unless you want them to. Glass clarity embarrasses scopes costing twice as much. Includes throw lever positioned perfectly for support-hand manipulation. If you’re building a serious defensive or competition carbine, this is professional-grade glass at blue-collar pricing.

AGM Rattler Thermal Scope TS35-384

AGM Global Vision Rattler TS35-384 Thermal Imaging Riflescope for Hunting -…
  • High-Sensitivity Thermal Detector: The Rattler series scopes use a high-sensitivity thermal detector and a 1024×768 OLED monitor for a clear image in harsh environmental conditions like darkness, fog, and rain, making it an ideal thermal rifle scope for hunting in challenging environments.

Thermal changes everything. Last month, I tracked a wounded elk through thick timber at midnight – impossible with traditional night vision, child’s play with thermal. This AGM unit detects heat signatures to 1,350 yards, though positive ID happens closer to 600 yards.

At 18 ounces, it won’t turn your rifle into a boat anchor. The menu system makes sense even with cold fingers and tired eyes. Battery life (4.5 hours on CR123s) beats most competitors, and the external power option saved my bacon during an all-night coyote stake-out. Includes American Defense QD mount – quality hardware that’d cost $150 separately. For predator control or recovering game, thermal pays for itself quickly.

Proven Performers Under $500

Vortex Strike Eagle 5-25×56 FFP

Vortex Optics Strike Eagle 5-25×56 First Focal Plane Riflescope – EBR-7C Reticle…
  • The Strike Eagle 5-25×56 First Focal Plane (MRAD) scope provides the features needed to improve your long distance performance.

I’ve run this scope on my .22 trainer for two years. It’s not Razor glass, but for the money, it punches way above its weight. The 5-25x range covers everything from 50-yard rimfire competitions to 1,000-yard centerfire work. First focal plane means your holds stay consistent – critical when you’re shooting multiple distances quickly.

The RevStop Zero System actually works – dial up for distance, then return to your exact zero without counting clicks. Tracking tested true through 1,000+ rounds. Some chromatic aberration at maximum magnification, but stay under 20x and the image stays crisp. Includes sunshade, throw lever, and allen keys. For new precision shooters, this opens doors without emptying wallets.

Sig Tango-MSR 1-10x28mm LPVO with Mount

SIG SAUER Tango-MSR LPVO 1-10X28mm 34mm Tube F2/SFP MSR BDC-10 Reticle Durable…
  • TANGO-MSR LPVO 1-10X28MM – Designed for avid hunters & shooting enthusiasts, this riflescope offers swift target acquisition, industry-leading light transmission & quick engagement; With a High Performance 10x optical system with low dispersion glass, this 34mm maintube diameter hunting scope delivers unmatched precision, ensuring you never miss a crucial moment

Ten power in an LPVO seemed gimmicky until I tested one. Now it’s on my primary coyote rifle. The extra magnification means positive target ID at distances where 6x leaves you guessing. Low dispersion glass keeps the image sharp even at 10x – unusual at this price point.

The included ALPHA-MSR mount is bombproof and properly positioned for AR-height. Eleven illumination settings cover everything from pitch black to noon sunshine. The MSR BDC reticle works with 5.56, though I’ve made it work with .223 77-grain loads too. Sig’s lifetime warranty means something – they’ve replaced a damaged scope for a student, no questions asked.

Bushnell Match Pro 6-24x50mm FFP

Don’t let the Bushnell name fool you – this is serious glass for NRL22 and precision rimfire. The Deploy MIL reticle with floating center dot prevents the crosshair from obscuring small targets. Parallax adjusts down to 10 yards – crucial for rimfire work where you might shoot from 25 to 300 yards on the same stage.

Tool-less resettable turrets mean you can dial without worrying about losing zero. The clicks are positive and repeatable – tested through five matches without a single tracking issue. At this price, it embarrasses scopes costing twice as much. Perfect for someone getting into precision rimfire without breaking the bank.

Budget Glass That Doesn’t Suck

Vortex Diamondback 4-12x40mm

Vortex Optics Diamondback 4-12×40 Second Focal Plane Riflescope – Dead-Hold BDC…
  • The Diamondback 4-12×40 riflescope is one of multiple configurations in the Diamondback lineup and is ideal for a variety of applications.

This scope lives on my truck gun. It’s taken every abuse Montana can dish out – frozen solid, bounced around, covered in dust – and still holds zero. The Dead-Hold BDC reticle gives you quick holds for common hunting distances. Not match-grade glass, but more than adequate for deer hunting or predator control inside 400 yards.

At 14.2 ounces, it won’t make your rifle unwieldy. The turrets are capped to prevent accidental adjustment, and they track acceptably for a sub-$200 scope. Vortex’s VIP warranty means when (not if) you eventually break it, they’ll replace it free. For a beater rifle or loaner gun, this is perfect.

Primary Arms SLx 1-6x24mm LPVO

Primary Arms SLX 1-6×24 Second Focal Plane Gen IV Rifle Scope – Illuminated ACSS…
  • Fully Upgraded Optical System
  • Integrated Magnification Throw Lever
  • ACSS NOVA Fiber Wire Reticle

Primary Arms figured out fiber optic illumination – bright enough for daylight without batteries dying at the worst moment. The ACSS Nova reticle might look busy, but spend an hour learning it and you’ll understand the genius. Range estimation, moving target leads, and holdovers all built in.

True 1x magnification for both-eyes-open shooting, solid tracking through thousands of rounds, and glass clarity that shames scopes at twice the price. Perfect for 3-gun, home defense carbines, or general purpose rifles. The 30mm tube takes a beating and keeps working. For under $300, this transforms a basic AR into a capable system.

Vortex Sonora 4-12×44

Brand new model at an introductory price. Knowing Vortex, this will jump to $150+ after the holidays. Basic features done right – clear glass, reliable adjustments, proven Dead-Hold reticle. The 44mm objective and 4-inch eye relief make it comfortable for new shooters or those with heavy-recoiling rifles.

Nitrogen purged, O-ring sealed, and backed by Vortex’s lifetime warranty. Perfect for that youth rifle, .22 trainer, or backup hunting gun. At this price, buy two – one for the rifle, one for the spare parts shelf.

Digital Night Vision Deals

ATN X-Sight 4K Pro 5-20x

ATN X-Sight 4K Pro Smart Day/Night Hunting Scope w/Ballistics Calc, 3864×2218…
  • HD Sensor – delivers enhanced image sensitivity and razor sharp quality of view regardless the distance or lights condition.

Digital night vision that actually works. Records your hunts, has a legitimate ballistic calculator, and the one-shot zero feature actually saves time. Battery life (18+ hours claimed, 12-14 real world) beats most competitors.

Learning curve is steep – this isn’t grab-and-go equipment. But once mastered, you can spot and record predators at 300+ yards in complete darkness. The 4K sensor provides detail impossible with Gen 1 analog tubes. For documenting problem predators or night hunting where legal, this changes the game.

Sightmark Wraith 4K Mini 2-16×32

Sightmark Wraith 4K Mini 2-16×32 Digital Night Vision Riflescope
  • Cutting-Edge Digital Imaging: The Wraith 4K Mini boasts a state-of-the-art 3840×2160 CMOS sensor, providing unparalleled digital imaging capabilities that allow you to detect objects up to 300 yards away even in the darkest of nights.

Lighter and more compact than most digital units. The 4K recording helps with predator documentation or proving that trophy buck exists. Ten reticle options might seem excessive, but having the right reticle for your load matters when shooting at night.

Detection to 300 yards with built-in IR, full color in daylight. The aluminum construction survives real use – dropped one last season (accidentally) with no damage. IPX6 water resistance handled an unexpected downpour. For the price, it bridges the gap between toy night vision and professional thermals.

Store-Wide Sales Worth Browsing

OpticsPlanet Deals

Brownells Codes (Through Dec 1)

  • 15BF: 15% off non-excluded items
  • NOV125: $125 off $1,000+
  • NOV55: $55 off $500+
  • NOV20: $20 off $200+
  • Free shipping over $49

Amazon Optics Deals

How to Shop Smart This Black Friday

Check Real Prices

That “60% off” might be from an inflated MSRP nobody actually pays. I track street prices year-round – the deals I’ve listed are genuine savings from normal selling prices.

Consider Total Cost

A scope “deal” isn’t a deal if you need $200 in rings, bases, and tools to mount it. Factor in everything: mount, rings, level, torque wrench, thread locker. Sometimes a package deal with mount included (like the Sig Tango) saves more than a cheaper scope alone.

Warranty Matters

Vortex’s VIP warranty means something. So does Trijicon’s reputation. That bargain scope with no warranty becomes expensive when it breaks. Buy from companies that stand behind their glass.

Match Scope to Purpose

A 6-36x competition scope on a woods rifle is like wearing waders to a wedding – wrong tool for the job. Be honest about how you’ll use the scope. Most hunters never shoot past 300 yards. Most competitors never need past 20x. Buy what you’ll actually use.

Budget for Mounting

Quality rings and proper installation matter more than most realize. A $2,000 scope on garbage rings is worse than a $200 scope mounted correctly. Budget 10-20% of scope cost for quality mounting hardware.

The Bottom Line

Black Friday can save you serious money on quality glass – if you know what you’re looking for. The deals I’ve listed represent real value on scopes I’d run on my own rifles. Some, like the Razor HD Gen III at $2,529, might never be cheaper. Others, like the $99 Vortex Sonora, are perfect for specific applications.

Remember: a scope is an investment in your shooting. Whether you’re protecting livestock, feeding your family, competing, or just punching paper, good glass makes everything easier. But good glass on sale? That’s when you strike.

Practice makes permanent, so practice it right – with equipment that won’t let you down. The wilderness doesn’t care about Black Friday, but your wallet sure does.

Questions about specific scopes or mounting solutions? Check out my detailed reviews and how-to guides for getting the most from your optics investment.


About Flint: After 8 years as an Army Ranger and 15+ years guiding hunters in Montana, I’ve learned which equipment delivers when it matters. When not teaching courses or testing gear with Scout and River, I’m tracking prices and testing optics to help you make informed decisions.

SIG Romeo-X Compact: 18 Months of Daily Carry in Montana’s Extremes

0

Three winters ago, I watched a search-and-rescue volunteer fumble with iron sights on his carry pistol during a critical training scenario. Temperatures had dropped to -15°F, his hands were numb despite gloves, and precious seconds ticked away as he struggled to align his sights in fading light. That moment reinforced why I’ve been transitioning my defensive pistols to micro red dots – when seconds count, simplicity saves lives.

The SIG Romeo-X Compact landed on my radar after teaching a concealed carry course where four different students showed up with them mounted on their P365s. When multiple experienced carriers independently choose the same optic, it deserves serious evaluation. So I purchased one with my own money and subjected it to eighteen months of daily carry, training courses, and the kind of abuse that comes with living forty miles from the nearest town in Northern Montana.

What emerged from this extended test surprised me. This isn’t just another micro red dot trying to cash in on the pistol optics trend. It’s a thoughtfully designed tool that understands the unique demands of concealed carry in harsh environments. After carrying it through blizzards, dust storms, and everything Montana throws at those of us who refuse to stay indoors, I’ve formed strong opinions about where it excels and where it falls short.

Testing Framework: Beyond the Square Range

My evaluation protocol reflects real-world defensive carry requirements, not competition shooting or recreational plinking. Living near Glacier National Park means dealing with both two-legged and four-legged threats, often in conditions that would send most folks running for shelter.

The Romeo-X Compact spent time on three different platforms during testing:

  • My primary carry SIG P365XL (12 months)
  • Wife Sarah’s P365 (3 months for her evaluation)
  • A standard P365 used for student instruction (3 months)

This rotation provided perspective on how the optic performs across different hand sizes, carry positions, and skill levels. Sarah’s input proved particularly valuable – as a wildlife biologist who carries daily in the field, she demands equipment that works without fuss or failure.

Total round count exceeded 8,000 across all platforms, including:

  • 5,000+ rounds of standard pressure 115gr FMJ
  • 1,500 rounds of +P defensive loads
  • 1,000 rounds of subsonic suppressed
  • 500+ rounds of various student ammunition (quality varied wildly)
SIG SAUER Romeo-X Compact Pistol-Mounted Reflex Sight | Rugged Durable Aluminum…
  • DURABLE CONSTRUCTION – The ROMEO-X COMPACT, inspired by the MIL-SPEC ROMEO-M17, features a rugged CNC Machined 7075 Aluminum Housing, meeting military standards for reliability and performance, ensuring robustness to withstand challenging conditions; Suited for the optic ready P365 Family of pistols; Designed with RX footprint compatible with Shield RMS-c mounts, ensuring secure and versatile installation on compact pistols

Technical Foundation: Understanding the Design

Core Specifications

  • Magnification: 1x (true unmagnified view)
  • Reticle Options: 2 MOA dot / 32 MOA circle with dot
  • Battery: CR1632 (common, available everywhere)
  • Runtime: 20,000 hours claimed (more on this later)
  • Dimensions: 1.62″ x 1.29″ x 0.94″
  • Weight: 1 ounce exactly
  • Waterproofing: IPX-7 rated
  • Adjustment: 1.5 MOA per click
  • Housing: 7075-T6 aluminum
  • Window: Aspherical glass lens

What These Numbers Mean for Carriers

The compact dimensions matter more than you’d think. This optic adds minimal bulk to an already small pistol, maintaining the P365’s concealment advantage. I can still comfortably carry an appendix for 14-hour days, something larger optics make impossible for my body type.

The 1-ounce weight seems negligible on paper, but weight distribution matters in carry guns. The Romeo-X sits low enough that it doesn’t create the top-heavy feeling that makes some optic-equipped pistols flip out during the draw.

Accuracy and Precision: Where It Counts

Let me be clear: micro red dots won’t make you a better shooter, but they’ll help a good shooter perform better under stress. The Romeo-X Compact delivers the precision needed for defensive accuracy while remaining fast enough for close-quarters emergencies.

Range Performance

During formal accuracy testing from a Ransom Rest at 25 yards, the Romeo-X equipped P365XL consistently delivered:

  • 2-inch groups with quality defensive ammunition
  • 1.5-inch groups with match-grade loads
  • 3-inch groups with bulk range fodder

These results match or exceed what I achieve with iron sights under ideal conditions, but the real advantage appears under stress or suboptimal conditions.

Low Light Excellence

Here’s where red dots earn their keep. During a night training exercise last January, temperatures hovering around 10°F, I engaged multiple targets at varying distances from 3 to 25 yards. The Romeo-X’s dot remained crisp and visible against both lit and unlit backgrounds.

Traditional night sights would have required perfect sight alignment in conditions where my eyes were watering from the cold wind. The red dot simplified the equation: dot on target, press trigger. My hit percentage improved by roughly 30% compared to iron sights in similar conditions.

The Astigmatism Question

I’ve got mild astigmatism in my dominant eye – a souvenir from too many years squinting through rifle scopes in bright snow. Many red dots appear as starbursts or commas to my eyes. The Romeo-X shows minimal distortion, appearing as a slightly fuzzy dot rather than the severe streaking I see with some competitors.

Sarah has perfect vision and describes the dot as “laser sharp,” so your experience may vary based on your eyes. The good news: even with my imperfect vision, the dot remains completely usable for defensive accuracy.

Battery Life: The 20,000-Hour Reality

SIG claims 20,000 hours of battery life. Let’s examine that claim against real-world use.

Actual Performance

Running continuously at setting 8 (medium brightness), my first battery lasted 14 months of daily carry before the dot began dimming noticeably. That included:

  • Daily carry with MOTAC (Motion Activated) enabled
  • Weekly range sessions
  • Three multi-day training courses
  • Numerous presentation drills

Calculating actual “on” time is impossible with MOTAC, but I estimate 12,000-15,000 hours of real-world runtime – still exceptional for a micro dot.

The Side-Loading Advantage

The side-loading battery compartment represents intelligent design. I’ve changed batteries three times without removing the optic or losing zero. This feature alone makes it superior to bottom-loading designs that require dismounting.

During a February blizzard, I changed the battery in my truck with numb fingers wearing gloves. Try that with optics requiring bottom access – you’ll understand why side-loading matters.

Battery Strategy

I replace batteries annually on my birthday, regardless of condition. Old batteries become spares, carried in my emergency kit. At roughly $3 per battery, annual replacement costs less than a box of defensive ammunition – cheap insurance against failure.

Durability: Montana Torture Testing

Durability testing happened naturally through daily carry and use. The Romeo-X experienced:

Environmental Extremes

Temperature Range: -28°F to 103°F The optic functioned perfectly across this 131-degree span. The only issue: the adjustment turrets became stiff below -10°F, requiring more force to turn. This didn’t affect zero or function, just adjustment.

Moisture Exposure:

  • Complete submersion during a creek crossing (fell through ice)
  • Countless rain and snow storms
  • High humidity summer conditions
  • Pressure washing after a particularly muddy training day

Zero incidents of internal fogging or moisture intrusion. The IPX-7 rating proves legitimate.

Physical Abuse

The Truck Hood Test: While demonstrating drawing techniques, I accidentally launched my P365 onto my truck’s hood from chest height. The Romeo-X hit first, leaving a small ding in the hood. The optic showed minor cosmetic scratching but maintained zero perfectly.

The Gravel Roll: During force-on-force training, I performed a combat roll on sharp gravel while drawing. The Romeo-X scraped along roughly 6 feet of rocks. Result: cosmetic scratches on the housing, glass remained perfect, zero unchanged.

Daily Carry Wear: After 18 months of daily concealed carry, the anodizing shows holster wear on the corners and edges. This is purely cosmetic – the optic functions identically to new.

Failure Points

Only one issue emerged during testing: the brightness adjustment buttons can be activated accidentally during aggressive holstering. I’ve found my dot on maximum brightness several times after appendix carrying. While not a functional failure, it’s annoying and could theoretically drain the battery faster.

Ease of Use: Teaching Perspective

Having taught dozens of students to use red dot sights on pistols, interface design matters enormously. The Romeo-X gets most things right.

Control Logic

The two-button interface (+ and -) feels intuitive. Hold both for power on/off, tap for brightness adjustment. Long press switches between dot and circle-dot reticles. Simple enough that stressed shooters can operate it reliably.

Students typically master the controls within minutes, compared to some competitors requiring manual study. The only missing feature: button lockout to prevent accidental adjustment.

Zeroing Process

The 1.5 MOA click adjustments provide sufficient precision without being overly fine. Zeroing typically requires:

  1. Bore sight or shoot at 10 yards for rough zero
  2. Refine at 15 yards (my preferred pistol zero distance)
  3. Confirm at 25 yards

Most students achieve acceptable zeros within 20 rounds. The turrets provide positive clicks and maintain adjustments reliably. I’ve never experienced zero drift from the adjustments alone.

MOTAC (Motion Activated Illumination)

This feature deserves special recognition. The optic powers down after 2 minutes of inactivity, then instantly activates upon movement. During 18 months of carry, it’s never failed to illuminate when drawn.

For concealed carriers, MOTAC solves the battery anxiety problem. You’re not constantly wondering if you remembered to turn it on or off. It’s just ready when needed.

Optical Quality: Clarity Under Pressure

Glass quality in micro red dots often gets overlooked, but it matters when identifying threats versus friendlies in complex environments.

Lens Clarity

The Romeo-X provides surprisingly clear glass for its price point. Looking through the window, minimal distortion or color shift appears. This matters when assessing threats behind glass or in shadowed areas where color and detail provide critical information.

During a vehicle defense course, I could clearly identify “threats” versus “innocents” through car windows at 15 yards – something that proved challenging for students using lower-quality optics with pronounced blue or green tinting.

Brightness Settings

The 15 brightness levels (including 3 night vision settings I’ll never use) cover every possible scenario. Settings 1-3 work in complete darkness, 4-8 handle indoor and overcast conditions, 9-12 manage bright daylight, and 13-15 cut through direct sunlight on snow – a common issue here in Montana.

The dot maintains consistent size across brightness levels, unlike some budget options where cranking brightness bloats the dot size.

Reticle Options

The 2 MOA dot alone handles 90% of my needs. It’s small enough for precision shots yet visible enough for speed. The 32 MOA circle appears useful for extremely close, fast shooting, but I rarely use it.

Some instructors teach using the circle for close targets and dot for distance. Personally, I prefer consistency – dot only, all the time. Your preference may vary based on your shooting style and training.

Concealed Carry Reality: Daily Use Observations

Theory meets reality when you carry daily for 18 months. Here’s what I’ve learned:

Holster Compatibility

The Romeo-X required new holsters for all my carry positions. My previous iron-sight holsters wouldn’t accommodate the optic. Budget accordingly – quality optic-cut holsters run $75-150 each.

Currently using:

  • Tenicor Velo4 for appendix carry
  • Vedder LightDraw for strong-side OWB
  • JM Custom Kydex for pocket carry (backup gun)

All required the optic-cut option and extended lead times.

Draw Stroke Modifications

The optic changes your presentation slightly. The red dot must enter your vision as the gun reaches full extension. This requires consistent grip and presentation – sloppy draws that worked with iron sights won’t find the dot reliably.

After roughly 500 dry-fire presentations, finding the dot became automatic. Students typically need 200-300 repetitions to develop consistency. This isn’t a Romeo-X issue – it applies to all pistol red dots.

Concealment Impact

The Romeo-X adds roughly 0.75 inches to the gun’s height above the slide. Under a t-shirt, printing increases slightly but remains manageable. Under a flannel or jacket, it disappears completely.

For deep concealment in formal wear, the added bulk becomes noticeable. I’ve returned to iron-sight guns for wedding/funeral carry where absolute minimization matters.

Comparative Analysis: Market Position

Through my training business, I’ve handled most major micro red dots. Here’s how the Romeo-X compares:

Versus Holosun 507K X2

HOLOSUN HS507K X2 Multi-Reticle Red 2 MOA Dot & 32 MOA Circle Open Reflex Pistol…
  • HOLOSUN RED DOT SIGHT – The HS507K X2 is an open reflex optical sight designed for subcompact pistol applications; It features Lock Mode that locks the buttons preventing inadvertent setting changes; This handgun sight is a direct for P365X/XL, and requires an adapter plate for slides with a four-boss interface; Multi Tool, Lens Cloth, and User Manual are included

The Holosun offers similar features for less money, plus Solar Failsafe and Shake Awake technology. However, the Romeo-X’s enclosed emitter design better protects against debris – a real consideration in dusty/snowy conditions.

Winner: Tie (depends on priorities)

Versus Trijicon RMRcc 

The RMRcc brings Trijicon’s legendary durability and proven track record. But it lacks the Romeo-X’s battery life and requires removing the optic for battery changes. For $100+ more, I expected better features. Click here

Winner: Romeo-X (better value)

Versus Shield RMSc 

Shield Sights RMSc | Red Dot |GEN II | Glass Edition | 4MOA | Made in The UK
  • DURABLE: Aircraft Aluminum
  • COLOR: Hard Anodized Black
  • DOT: LED 4 MOA
  • ORIGIN: Made in UK
  • BATTERY: 3 Yrs. Life Approximately CR2032

The RMSc sits lower and conceals better but uses an uncommon battery and lacks the Romeo-X’s durability. Glass quality also falls short in my experience.

Winner: Romeo-X (overall performance)

Versus Aimpoint ACRO P-2

Aimpoint ACRO™ P-2 Red Dot Reflex Sight 3.5 MOA – 200691
  • 3.5 MOA red dot
  • Battery life: 50,000 hours (over 5 years); Battery type: CR2032 battery (battery included)
  • Optimized for applications which require a low-profile red dot system
  • Submersible to 115 feet (35 meters)
  • INCLUDES: CR2032 battery, Aimpoint T10 tool

The ACRO represents the gold standard in duty-grade enclosed pistol optics. Superior in every measurable way except price and size. For uniformed duty use, I’d choose the ACRO. For concealed carry, the Romeo-X makes more sense.

Winner: Application dependent

Training Integration: Making It Work

A red dot sight requires different training approaches than iron sights. Here’s what I’ve learned teaching students:

The Learning Curve

New red dot users typically experience:

  • Week 1-2: Frustration finding the dot quickly
  • Week 3-4: Increasing consistency in presentation
  • Week 5-8: Speed approaching iron sight times
  • Month 3+: Surpassing iron sight performance

Patience during the transition pays dividends. Every student who stuck with it for three months preferred the red dot over returning to iron sights.

Critical Drills

These drills accelerate red dot proficiency:

  1. Wall Drill: Present to a blank wall, focusing on dot appearance in your vision
  2. Target Transition: Engage multiple targets at varying distances
  3. Position Shooting: Practice finding the dot from unconventional positions
  4. Single-Hand: Both strong and weak hand only
  5. Movement: Drawing while moving in various directions

Dry fire these drills daily for two weeks, and live fire proficiency follows naturally.

Common Mistakes

Students consistently make these errors:

  • Over-gripping when they can’t find the dot
  • Fishing for the dot with wrist movement
  • Focusing on the dot instead of the target
  • Neglecting iron sight backup skills
  • Mounting the optic without witness sights

Address these early to prevent bad habits from forming.

Accessories and Modifications

While functional from the box, these additions enhance the Romeo-X experience:

Essential Upgrades

Suppressor Height Iron Sights 

Absolute necessity. When (not if) your battery dies at the worst moment, backup sights save the day. I run Ameriglo GL-429 sights for lower 1/3 co-witness.

Quality Weapon Light

The Streamlight TLR-7 Sub pairs perfectly, adding minimal bulk while providing 500 lumens for positive threat identification.

Protective Lens Covers 

Not for carry, but essential during training to protect glass from brass and debris. Remove before holstering.

Maintenance Items

Lens Pen ($15) Essential for field cleaning. Keep one in your range bag and vehicle.

Spare Batteries ($10) Buy a 5-pack annually. Distribute between range bag, vehicle, and home.

Blue Loctite ($5) Applied to mounting screws during installation. Prevents loosening without permanent bonding.

Long-Term Reliability Assessment

After 18 months and 8,000+ rounds, here’s the reliability scorecard:

Zero Failures

  • Electronic malfunctions
  • Water intrusion
  • Loss of zero from recoil
  • Cracked or broken glass
  • Complete battery failure (always had warning)

Minor Issues

  • Accidental button activation (3-4 times monthly)
  • Brightness adjustment in extreme cold (below -10°F)
  • Cosmetic wear from daily carry

Maintenance Required

  • Annual battery replacement
  • Monthly lens cleaning
  • Quarterly screw torque check

This reliability record equals or exceeds my experience with premium iron sights. The Romeo-X has earned trusted status for defensive carry.

Investment Analysis: True Cost of Ownership

Let’s examine the complete financial picture:

Initial Investment:

  • Romeo-X Compact: $480
  • Installation (if needed): $50
  • Suppressor height sights: $120
  • New holsters (3): $300
  • Total: $950

Annual Operating Cost:

  • Battery: $3
  • Lens cleaning supplies: $5
  • Total: $8/year

Training Investment:

  • 500 rounds for transition: $200
  • Professional instruction: $150
  • Total: $350 (one-time)

Ammunition Savings: After transition, my hit percentage improved roughly 20% under stress. This means fewer rounds needed to achieve training goals, saving approximately $300 annually in ammunition costs.

The Romeo-X pays for itself through improved performance and reduced training ammunition within 3-4 years.

Critical Weaknesses: Honest Assessment

No equipment is perfect. The Romeo-X’s shortcomings:

Button Lockout Absence

The lack of button lockout represents a significant oversight. Accidental activation happens regularly enough to be annoying. SIG should address this in future versions.

Limited Reticle Options

While the dot/circle-dot works for most, some shooters prefer different reticle patterns. Competitors offer more options.

Price Point

At $480, the Romeo-X costs significantly more than capable competitors like the Holosun 507K. The enclosed emitter design partially justifies this, but value-conscious buyers have alternatives.

Proprietary Footprint

While it fits the ROMEOZero footprint, adapter plates add cost and height for other platforms. Direct mounting options remain limited.

The Verdict: Earned Trust Through Fire

After 18 months of daily carry through Montana’s worst weather, thousands of rounds, and constant use in training courses, the SIG Romeo-X Compact has earned its place on my primary defensive pistol.

Is it perfect? No. The missing button lockout frustrates me regularly, and the price stings compared to feature-rich competitors. But where it counts – reliability, durability, and performance under stress – it delivers consistently.

For concealed carriers serious about defensive capability, the Romeo-X represents a solid investment. It won’t make you a better shooter, but it will help you shoot better when conditions are suboptimal and stress is high. In defensive situations, that advantage could prove decisive.

The enclosed emitter design particularly suits those of us in harsh environments where dust, snow, and debris are constant companions. While competitors offer similar features for less money, the Romeo-X’s proven reliability in extreme conditions justifies its premium for serious defensive carriers.

My recommendation: If you carry daily in challenging environments and demand equipment that works when life depends on it, the Romeo-X Compact deserves consideration. If you’re a fair-weather carrier or recreational shooter, save money with a Holosun 507K.

For my use – daily carry in Montana’s extremes where both two and four-legged threats exist – the Romeo-X has proven itself repeatedly. It’s earned permanent residence on my defensive pistol through consistent performance when conditions would sideline lesser optics.

Practice makes permanent, so practice it right.


Ready to transition to a pistol red dot? Start with my comprehensive guide to pistol red dot fundamentals, or explore our detailed comparison of defensive handgun sighting systems. Your accuracy under stress depends on proper equipment and training – invest in both.

What’s your experience with pistol-mounted optics? Have you made the transition from iron sights, or are you still evaluating options? Share your insights below – I personally respond to every comment, and your experience helps others make informed decisions.

Vortex Venom 5-25×56: When Precision Meets Prairie Wind

0

Two summers back, I watched a competitive shooter friend burn through $4,000 worth of premium European glass trying to find the “perfect” long-range scope. Meanwhile, I was ringing steel at 1,200 yards with a Vortex Venom that cost less than his scope rings. Sometimes the best tool isn’t the most expensive one – it’s the one that shows up and does the work without drama or excuses.

The Vortex Venom 5-25×56 represents something important in the precision rifle world: competent long-range capability that doesn’t require a second mortgage. After three years of prairie dog towns, steel matches, and one memorable elk hunt at 627 yards, I can tell you exactly what this scope delivers and where it comes up short.

The Long-Range Reality Check

During my eight years as an Army Ranger, we had a saying: “Perfect is the enemy of good enough.” That philosophy applies directly to precision rifle scopes. You can spend $3,000 chasing that last 5% of optical perfection, or you can spend $800 on something that handles 95% of real-world shooting scenarios. The Venom sits firmly in that second category, and that’s not an insult.

Let me share what three years and roughly 8,000 rounds have taught me about this particular piece of Wisconsin-made glass.

Understanding the Vortex Venom Platform

Specifications That Actually Matter

Core Numbers:

  • Magnification: 5-25x (5:1 zoom ratio)
  • Objective: 56mm
  • Tube: 34mm diameter
  • Eye Relief: 3.6-4.0 inches
  • Length: 15.3 inches
  • Weight: 35 ounces (2.2 pounds)
  • Field of View: 21.2 feet at 5x, 4.7 feet at 25x (at 100 yards)
  • Elevation Travel: 85 MOA (25 MRAD)
  • Click Value: 0.25 MOA or 0.1 MRAD
  • Reticle: EBR-7C (First Focal Plane)
  • Zero Stop: RevStop system
  • Construction: Single-piece aluminum tube

Those numbers paint a picture of a scope built for serious distance work without serious pretension.

Vortex Optics Venom 5-25×56 First Focal Plane Riflescope – EBR-7C (MOA) Reticle
  • The Venom 5-25×56 First Focal Plane (MOA) riflescope is built for long-range and competition with a 5-25x mag range built into a 34mm tube for a massive amount of turret travel (85 MOA max elevation/windage).

Three Years of Montana Testing

Primary Test Platforms

The Venom has lived on three different rifles:

  1. Tikka T3x TAC A1 in 6.5 Creedmoor – Primary long-range rig
  2. Savage 110 Tactical in .308 – Training and backup rifle
  3. Ruger Precision Rimfire – Skills development and prairie dogs

Each platform revealed different aspects of the scope’s personality.

Optical Performance: Clear Enough to Matter

Let’s address the elephant in the scope ring: No, this isn’t Swarovski glass. It’s not even Vortex Razor glass. But here’s what matters – at 800 yards, I can clearly see .308 holes in white paper. At 1,000 yards, I can spot impacts on steel. At 400 yards, I can count points on a mule deer.

The glass quality sits somewhere between “good enough” and “surprisingly good.” There’s minimal chromatic aberration (color fringing) until you hit maximum magnification. Edge clarity degrades in the outer 10% of the sight picture, but your reticle lives in the center where clarity is excellent.

During a prairie dog hunt last May, I spent three days behind this scope in bright sun, heat mirage, and dust. The glass never fatigued my eyes, never lost contrast in harsh light, and always showed me what I needed to see. That’s practical performance that matters more than laboratory measurements.

The EBR-7C Reticle: Busy But Useful

First Focal Plane (FFP) means the reticle grows and shrinks with magnification, keeping subtensions accurate at any power. The EBR-7C reticle looks like someone threw a protractor at a Christmas tree, but once you understand it, the system works.

The center crosshairs are thin enough for precision without disappearing in low light. The hash marks provide holds for wind and elevation without cluttering the primary aiming point. At 5x, the reticle is usable but small. At 25x, it’s perfect for precision work.

I’ve used this reticle to hold for 15 mph crosswinds at 600 yards and walk shots onto steel at 1,200 yards. It’s not as clean as a simple crosshair, but it’s far more useful when you need to make quick corrections without dialing.

Tracking and Turrets: Where Budget Shows

The turrets track accurately – that’s the good news. In box tests and tall target tests, the Venom returns to zero reliably and adjustments are consistent. I can dial 20 MOA up, shoot, dial back down, and impact at my original zero every time.

But the turrets feel… budget. The clicks are positive but not crisp. There’s a sponginess that premium scopes don’t have. The RevStop zero system works but lacks the positive lock of higher-end alternatives. It’s like comparing a Toyota Corolla to a BMW – both get you there, but one feels better doing it.

During a PRS-style match, I ran the turrets hard – constant dialing between 3 and 15 MOA for various distances. They never failed, never slipped, never lost zero. But by day’s end, my fingers were sore from the effort required to turn them quickly. The included throw lever helps with magnification changes, but the turrets could use their own leverage enhancement.

Parallax: The Achilles Heel

Here’s the Venom’s biggest weakness: parallax adjustment accuracy. The markings on the parallax knob are suggestions, not promises. When the knob says 300 yards, actual parallax-free distance might be 250 or 350 yards.

This isn’t a deal-breaker – you learn to adjust parallax by looking through the scope, not at the markings. Move your head slightly while looking at the target; adjust until the reticle doesn’t shift. It becomes second nature, but it’s an annoyance that shouldn’t exist at this price point.

Durability: Wisconsin Tough

Three years of hard use have proven the Venom’s toughness:

  • Survived a tumble down a shale slope (rifle and scope)
  • Endured -30°F to 100°F temperature swings
  • Handled approximately 8,000 rounds including hot .308 loads
  • Stayed waterproof through multiple stream crossings
  • Maintained zero through rough truck rides on ranch roads

The only visible wear is slight ring marks and minor finish wear on the turret edges. Internally, it’s still perfect. The nitrogen purging works – no fogging even during rapid temperature changes that challenge lesser scopes.

Vortex’s lifetime warranty means something too. A friend destroyed his Venom in a vehicle accident (scope was least of his worries). Vortex replaced it no questions asked. That’s peace of mind worth considering.

Real-World Performance

Long-Range Steel

At my local 1,000-yard range, the Venom is more than adequate. With good ammunition and solid fundamentals, first-round hits on 12-inch plates are routine. The magnification range covers everything from load development at 100 yards to spotting impacts at maximum distance.

The 25x top end provides enough magnification to see bullet trace in the right conditions. That visual feedback accelerates learning and helps diagnose missed shots. At 5x, the wide field of view helps spot impacts when shooting without a spotter.

Hunting Applications

Last September, I took a mature bull elk at 627 yards using the Venom. In fading light, I could clearly identify the bull, confirm the shot angle, and place the crosshairs precisely behind the shoulder. The scope did its job without drama.

The weight (35 ounces) makes this a dedicated long-range hunting scope, not an all-around mountain rifle option. On my Tikka, it balances well but adds noticeable weight for carrying. For spot-and-stalk western hunting where shots might stretch past 400 yards, it’s perfect. For timber hunting, it’s overkill.

Prairie Dog Precision

On prairie dog towns, the Venom shines. The magnification range lets you spot dogs at distance, then zoom in for precise shots. The reticle subtensions work for quick holds on small targets. The clarity is sufficient to spot hits and misses on tiny targets.

During a three-day shoot last spring, I fired approximately 800 rounds through a .223 wearing the Venom. It handled the high-volume shooting without any shift in zero or degradation in performance. That’s reliability that builds confidence.

Competition Use

In local PRS-style matches, the Venom is competitive but not optimal. It lacks the tool-less turret reset, advanced reticles, and ultra-precise tracking of dedicated competition scopes. But for club-level matches, it’s absolutely adequate.

I’ve placed in the top third running the Venom against much more expensive glass. The limitation is more often the shooter than the scope. For someone entering precision rifle competition, the Venom offers enough capability to learn and grow without immediate equipment limitations.

Compared to the Competition

Versus Arken EP5 5-25×56

The Arken offers similar features plus illumination for less money. Turrets feel better, weight is similar, glass is comparable. For pure value, the Arken wins. But Vortex’s warranty and customer service tip the scales back toward the Venom for many shooters.

Versus Vortex Viper PST Gen II 5-25×50

Step up to the Viper PST Gen II and you get better glass, illumination, and improved turrets. For serious competition or professional use, yes. For recreational shooting and hunting, the Venom is sufficient.

Vortex Optics Viper PST Gen II 5-25×50 First Focal Plane Riflescope – EBR-7C…
  • The Viper PST Gen II takes incredible performance and rock solid features to new heights. The 5-25×50 first focal plane riflescope is incredibly versatile and ideal for close to long range scenarios.

Versus Athlon Ares ETR 4.5-30×56

The Athlon offers more magnification range, better turrets, and comparable glass. But it’s also heavier and more expensive. The Athlon is the better scope; the Venom is the better value.

Athlon Optics Ares ETR Riflescope 4.5-30×56 34mm APRS1 FFP IR MIL Reticle, Black
  • 0.1 MIL Click Value, 32 MIL Total Elevation Adjustment, 25 Yard to Infinity Parallax Adjustment, 6 Illumination Settings.
  • First focal plane reticle stays valid at all power settings allowing you to fully utilize the specially designed reticle that shrinks or grows along with your target as you zoom in or out.

Versus Nightforce ATACR 5-25×56

Different league entirely. The Nightforce is superior in every measurable way. But it costs three times as much. Unless you’re a professional shooter or have unlimited budget, the performance difference doesn’t justify the price difference for most users.

Nightforce ATACR 5-25x56mm First Focal Plane (F1/FFP) 34mm Tube Durable Precise…
  • EXCEPTIONAL OPTICAL PERFORMANCE – The Nightforce ATACR – 5-25x56mm F1 hunting scope features top-tier ED glass, providing outstanding optical clarity and brightness. This ensures sharp, vivid images, even in challenging lighting conditions, enabling precise target identification and engagement

Living With the Venom

What Works Well

  • Glass clarity sufficient for any practical shooting
  • Reliable tracking and return to zero
  • Excellent warranty and customer service
  • RevStop zero system, while basic, functions well
  • Included throw lever and sunshade
  • Price-to-performance ratio

What Needs Improvement

  • Parallax adjustment accuracy
  • Turret feel could be more refined
  • Weight might deter some users
  • No illumination option
  • Rubber bikini lens covers instead of flip-caps

Practical Workarounds

Every scope has compromises. The Venom’s are manageable:

  • Ignore parallax markings, adjust by eye
  • Add aftermarket turret levers for faster adjustment
  • Upgrade to flip-up lens covers immediately
  • Accept the weight or hit the gym
  • Learn to work without illumination

The Investment Analysis

At $700-900, the Venom offers tremendous value:

  • Entry into serious long-range shooting
  • Lifetime warranty protection
  • Proven track record
  • Sufficient quality for most applications
  • Room to grow as skills develop

Compare that to $2,500+ for premium options that offer maybe 20% more performance, and the math becomes clear. For recreational shooters and hunters, the Venom makes sense.

Field Intelligence Summary

Who Should Buy This

  • Hunters taking shots past 400 yards
  • New long-range shooters learning the discipline
  • Prairie dog and varmint shooters
  • Budget-conscious precision rifle competitors
  • Anyone needing reliable long-range capability without premium pricing

Who Should Look Elsewhere

  • Professional precision rifle competitors
  • Military/LE snipers
  • Unlimited budget shooters
  • Weight-conscious mountain hunters
  • Those requiring illuminated reticles

The Bottom Line

The Vortex Venom 5-25×56 is the scope equivalent of a trustworthy ranch truck – not fancy, not perfect, but absolutely reliable and capable of real work. It bridges the gap between entry-level and professional-grade optics, offering sufficient quality for 95% of shooters at 30% of premium prices.

After three years and thousands of rounds, mine continues to perform without drama. It’s taken elk, rung steel at four-digit distances, and taught me more about long-range shooting than any piece of equipment should. That’s value that transcends specifications.

Your best survival tool is the six inches between your ears, but those six inches need quality glass to reach past 500 yards effectively. The Venom provides that capability without requiring you to sell the truck to afford it.

Final Assessment

The Venom isn’t the best long-range scope available, but it might be the smartest purchase for most shooters. It offers enough quality to grow with your skills, backed by a warranty that means something. The minor frustrations (parallax adjustment, turret feel) are manageable, while the core performance is rock-solid.

Practice makes permanent, and you can afford more practice ammunition when you don’t blow the budget on glass. The Venom lets you invest in both equipment and training.

The wilderness doesn’t care about your scope’s pedigree, only whether you can make the shot when it counts. The Venom has proven it can, repeatedly, in conditions that matter.

Plan for the worst, hope for the best, and remember – hits count more than hardware.

Want more honest long-range optics reviews? Visit Moosir.com where we test gear at actual distances, not just on paper. Because knowing your equipment’s real capabilities beats believing marketing claims every time.

How to Zero Your Red Dot Without Wasting Ammo: Field-Tested Methods That Actually Work

0

Last winter, I had a student show up to my carbine course with a brand-new red dot mounted ten minutes before class. No zero, no idea where it would hit, and ammo prices being what they were, he couldn’t afford to waste rounds finding out. In twenty minutes, using nothing but a bore sight and some basic knowledge, we had him hitting steel at 50 yards on his first shot. That’s when I realized how many shooters don’t know you can get remarkably close to zero without firing a single round.

After eight years in the Rangers where ammunition was unlimited (taxpayer funded), transitioning to civilian life meant learning to conserve rounds. Now, with ammo prices fluctuating worse than Montana weather, I’ve perfected several methods to get on paper without burning through a box of cartridges. Whether you’re setting up a new optic, switching between rifles, or just trying to save money, these techniques will get you close enough that final zeroing only takes a few rounds.

Your best survival tool is the six inches between your ears – use it to understand the relationship between your bore axis and sight plane. Once you grasp that concept, the rest is just mechanical process.

Understanding What We’re Actually Doing

The Bore-to-Sight Relationship

Every sight sits above your bore by some distance – usually 2.5 to 3 inches for red dots on ARs. Your bullet travels in an arc, rising to meet your line of sight, crossing it twice – once up close and once at your zero distance. We’re trying to align these two paths without seeing where bullets impact.

Think of it like this: your bore is a laser pointing where bullets will initially travel. Your sight is another laser showing where you’re aiming. We need these “lasers” to converge at our desired distance. That’s all zeroing really is – making these two paths meet where we want them.

Why This Works (And When It Doesn’t)

Bore sighting gets you close – usually within 6 inches at 25 yards, often much better. It won’t give you a perfect zero because:

  • Barrel harmonics affect point of impact
  • Ammunition variations matter
  • Environmental conditions change things
  • Your mounting might have slight cant

But it will get you on paper, saving ammunition and time. Perfect is the enemy of good enough, and bore sighting is definitely good enough to start.

Method 1: Laser Bore Sighting (The Modern Way)

Equipment Needed

I use a Sightmark Universal Laser Bore Sight for most rifles. Costs about $40, saves hundreds in ammo over its lifetime. The chamber-specific models work better than universal muzzle-mounted types, but both function.

Sightmark Universal Boresight with Red Laser
  • <5mW 632-650nm Class IIIA Red Laser: Precision boresighting with a safe, visible reference point. Align sights accurately with this low-power output device, ensuring greater zeroing accuracy for enhanced performance.

For precision, chamber-insert models like the Wheeler Professional Bore Sight give best results. They center perfectly in your chamber, eliminating angular error.

Wheeler Professional Laser Bore Sighter with Magnetic Connection, Multiple…
  • SPECS: Class IIIa with power output of less than 5mW
  • Highly Visible Laser: Green laser is easily visible in both bright and dark lighting conditions

The Process That Works

Step 1: Safety First

  • Clear your weapon completely
  • Remove the bolt if possible (bolt guns)
  • Triple-check the chamber
  • Point in safe direction always

Step 2: Install the Bore Sight

  • Chamber inserts: Close bolt gently on laser
  • Muzzle types: Expand arbor until snug (don’t overtighten)
  • Magnetic types: Center on muzzle crown

Step 3: Set Your Distance

  • 25 yards for initial zero (most common)
  • Indoor: Measure exactly with tape
  • Outdoor: Pace it off (my stride is almost exactly one yard)

Step 4: Steady the Rifle

  • Use a proper rest or bags
  • Bipod plus rear bag works great
  • Lead sled or gun vise is ideal
  • Kitchen table with rolled towels works in a pinch

Step 5: Align the Dots

  • Turn on laser (should project clear dot on target)
  • Without moving rifle, adjust red dot to cover laser dot
  • Make windage adjustments first, then elevation
  • Double-check by slightly moving rifle – dots should track together

Real-World Results

Last month, I bore-sighted five rifles for a basic rifle class. Results at 25 yards:

  • Rifle 1: 2 inches low, 1 inch right
  • Rifle 2: Dead on (lucky)
  • Rifle 3: 3 inches high, centered
  • Rifle 4: 1 inch low, 2 inches left
  • Rifle 5: 4 inches right, centered

All were on paper. Total rounds to complete zeros: 15 rounds across all five rifles.

Method 2: Visual Bore Sighting (The Traditional Way)

When This Works Best

Bolt-action rifles where you can remove the bolt completely. Also works with break-action shotguns and some semi-autos with removable upper receivers (ARs).

The Old-School Process

Step 1: Create a Bore View

  • Remove bolt completely (bolt guns)
  • Separate upper/lower (ARs)
  • Open action fully (break-actions)

Step 2: Secure the Rifle

  • Must be absolutely stable
  • Sandbags or gun vise required
  • Any movement ruins the process

Step 3: Look Through the Bore

  • Find distinct aiming point at 25+ yards
  • Center target in bore view
  • Target should fill about 1/4 of bore view

Step 4: Adjust Sight Without Moving Rifle

  • Keep bore centered on target
  • Adjust red dot to same point
  • Check bore alignment frequently
  • Patient, small adjustments

Accuracy Expectations

Visual bore sighting is less precise than laser methods but still effective. Expect to be within 6-8 inches at 25 yards. I’ve gotten within 2 inches with patience, but that’s exceptional.

This method taught me patience during Ranger School when we had no fancy tools. Still works today when batteries die or equipment fails.

Method 3: The Mirror Method (For Indoor Work)

Setting Up Inside

Developed this during a Montana blizzard when I needed to mount a new red dot but couldn’t get to the range for weeks.

Requirements:

  • Large mirror (bathroom mirror works)
  • 10+ feet of space
  • Dim lighting
  • Steady rest

Process:

  1. Set rifle on rest facing mirror at 10 feet
  2. Look through red dot at reflection
  3. You’ll see the dot and its reflection
  4. Adjust until dot covers its own reflection
  5. This centers the dot in the optic

This doesn’t zero your rifle but centers the dot mechanically. Combined with bore sighting later, it saves time and ensures your dot is optically centered before starting.

Method 4: The Target Grid System

For Precision Shooters

Learned this from a Marine Corps competition shooter. More complex but incredibly accurate.

Setup:

  1. Print a grid target with 1-inch squares
  2. Mount at exactly 25 yards
  3. Laser bore sight to center of grid
  4. Note which grid square laser hits
  5. Adjust red dot to same square
  6. Document offset for future reference

This creates a documented offset you can replicate. I keep notes on all my rifles – saves time when switching optics.

Understanding MOA and Adjustments

Making It Simple

One MOA equals roughly 1 inch at 100 yards. At 25 yards (where we’re bore sighting), one MOA equals 1/4 inch. So:

  • 4 clicks of a 1/4 MOA adjustment = 1/4 inch at 25 yards
  • 4 clicks = 1 inch at 100 yards

Most red dots adjust in 1/2 MOA clicks. Each click moves impact:

  • 1/8 inch at 25 yards
  • 1/2 inch at 100 yards

Write this down and tape it to your rifle case. Under stress, math becomes hard.

Common Mistakes to Avoid

Over-Adjusting: Make small adjustments, check, repeat. Large adjustments lead to chasing zero.

Wrong Direction: Remember the arrow indicates where IMPACT moves, not the dot. Confused me for years.

Forgetting Distance: Adjustments at 25 yards have 4x the effect at 100 yards.

Assuming Perfect: Bore sighting isn’t zeroing. Always confirm with live fire.

Environmental Considerations

Temperature Effects

Learned this the hard way in Afghanistan: extreme temperature changes affect zero. A rifle zeroed at 70°F might be 2 inches off at -10°F. The bore sight gets you close, but confirm zero in conditions you’ll actually shoot in.

Indoor vs Outdoor

Indoor bore sighting eliminates wind but gives false confidence. That perfect alignment at 25 feet might be 6 inches off at 25 yards outside. Always verify outdoors when possible.

Practical Applications

New Optic Installation

Every new red dot I mount gets bore sighted first. Saves average of 20 rounds per optic. At current ammo prices, the bore sight pays for itself twice per use.

Switching Between Rifles

QD mounts don’t always return to perfect zero. Bore sight verification takes 2 minutes, confirms mount returned correctly. Saved me embarrassment at matches multiple times.

Post-Impact Checks

Dropped your rifle? Took a spill? Airline destroyed your case? Bore sight check tells you if zero shifted without wasting ammo.

Teaching New Shooters

Students appreciate not wasting money while learning. Bore sight their rifles, let them fire 5 rounds to confirm, spend rest on actual training.

Tools Worth Investing In

Essential:

  • Quality Laser Bore Sight: Wheeler or Sightmark
  • Shooting Rest: Caldwell or MTM
  • Target Stand: make your own
Caldwell Lead Sled 3 Adjustable Ambidextrous Recoil Reducing Rifle Shooting Rest…
  • VERSATILITY: Ideal for sighting in and reducing recoil from magnum rifles and shotguns
MTM KSR-30 K-ZONE Shooting Rest
  • K-Zone Shooting Rest is a fully adjustable rugged rifle and handgun shooting rest

Nice to Have:

  • Gun Vise: Tipton or P3 Ultimate
  • Rangefinder: Confirms exact distances
  • Bubble Level: Ensures rifle is level
Tipton Best Gun Vise with Secure Adjustable Cradle, Storage Compartments for…
  • EASE OF USE: L-shape center support holds break-open guns securely and separate quick-release cam blocks move independently to accommodate any stock shape
CTK PRECISION P3 Ultimate Gun Vise
  • The perfect tool for gun maintenance, gun cleaning and boresighting!
  • Adjusts to accommodate both rifles and pistols.

Budget Alternative:

Spent $15 total at hardware store for:

  • Small laser pointer
  • Rubber stoppers
  • Electrical tape

MacGyvered a functional bore sight that’s ugly but works.

The Complete Process (My Method)

  1. Mount red dot properly (correct torque, Loctite, aligned)
  2. Center dot mechanically (mirror method)
  3. Laser bore sight at 25 yards (precision method)
  4. Document adjustments made (future reference)
  5. Confirm with 3-5 rounds (verify and fine-tune)
  6. Final zero at desired distance (50, 100, 200 yards)

Total rounds fired: 10-15 maximum for perfect zero

Common Questions Answered

Q: How accurate is bore sighting? A: Typically within 4-6 inches at 25 yards. I’ve achieved 1-inch accuracy with patience, but don’t expect perfection.

Q: Can I bore sight a pistol? A: Yes, but it’s harder due to shorter sight radius. Laser cartridge bore sights work best for handguns.

Q: Do I still need to shoot after bore sighting? A: Absolutely. Bore sighting gets you close, but final zero requires live fire. No exceptions.

Q: How often should I check bore sight? A: After any impact, before important events, when changing ammunition types, or seasonally with temperature changes.

Q: Is expensive bore sight equipment worth it? A: For occasional use, no. Basic $40 laser works fine. For gunsmith or instructor use, yes – precision equipment saves time.

Final Wisdom

Bore sighting is a tool, not a solution. It gets you close enough to finish with minimal ammunition expenditure. In today’s market, that matters.

Practice makes permanent, so practice the process correctly. The more you bore sight, the better you’ll understand your rifle’s relationship between bore and sight. That understanding makes you a better shooter.

The wilderness doesn’t care if you’re zeroed – but you will when that trophy buck appears at 200 yards or when defending your home. Take the time, use these methods, save ammunition for actual training.

Remember: bullets confirm zeros, but bore sights save money getting there.

Want to master your rifle setup? Check out my guides on proper scope mounting, understanding MOA vs MIL, and building a dope card for your rifle.

About Flint: After 8 years as an Army Ranger and 15+ years teaching marksmanship, I’ve zeroed more rifles than I can count. When not instructing or guiding hunts, you’ll find me testing new methods with Scout and River, always seeking ways to save ammunition while maintaining precision.

Vortex Crossfire II 3-9×40: Three Seasons of Hard Montana Testing

0

Two Octobers ago, I watched a client miss a beautiful six-point bull elk at 200 yards – not because of poor shooting fundamentals or buck fever, but because his budget scope fogged internally during a temperature swing. That costly miss reinforced a lesson my grandfather taught me forty years ago: “Son, you can’t hit what you can’t see clearly.” Since then, I’ve made it my business to test every scope that promises reliability without requiring a second mortgage.

The Vortex Crossfire II 3-9×40 caught my attention after three different hunting clients showed up with them mounted on their rifles last season. When three independent hunters choose the same optic, it’s worth investigating. So I bought one with my own money and subjected it to three full seasons of guiding, hunting, and the kind of abuse that Northern Montana dishes out regularly.

What I discovered surprised me. This sub-$200 scope has accompanied me on everything from September archery scouting trips to late-season elk hunts in January’s brutal cold. It’s been dropped, frozen, soaked, and banged around in ways that would make most shooters cringe. Yet it keeps delivering clear sight pictures and holding zero like scopes costing three times as much.

Testing Protocol: Real Mountains, Real Conditions

My approach to testing optics differs from bench-rest reviews you’ll find elsewhere. Here near Glacier National Park, equipment faces temperature swings of 60 degrees in a single day, sudden snowstorms in September, and the kind of rough handling that comes with scrambling through deadfall timber after wounded game.

I mounted this Crossfire II on three different rifles over the testing period: my backup Remington 700 in .270 Winchester, a Ruger American .308 I use for client instruction, and briefly on my wife Sarah’s Tikka T3 in .243. This gave me perspective on how it performs across different platforms and recoil levels.

Each rifle saw a minimum of 200 rounds with the Crossfire II mounted, including load development, zeroing, and field use. That’s 600+ rounds of documented performance data, not counting the countless dry-fire practice sessions and carrying miles through the backcountry.

The Complete Breakdown: What Vortex Built

Technical Specifications

  • Magnification Range: 3-9x (the sweet spot for Western hunting)
  • Objective Lens: 40mm diameter
  • Tube Diameter: 1 inch (standard rings work perfectly)
  • Eye Relief: 3.8 inches (generous and consistent)
  • Field of View: 34.1 feet at 100 yards (3x) to 12.6 feet (9x)
  • Click Value: 1/4 MOA per click
  • Adjustment Range: 60 MOA elevation and windage
  • Parallax Setting: Fixed at 100 yards
  • Weight: 15 ounces
  • Reticle: Dead-Hold BDC (bullet drop compensator)
  • Construction: Single-piece aircraft aluminum tube
  • Price Point: Under $200 street price
Vortex Optics Crossfire II Dead Hold BDC Reticle Riflescope, 3-9×40, Black…
  • The 3-9×40 Crossfire II riflescope is one of many configurations in the Crossfire II line. The Dead-Hold BDC reticle is good for hunting at varying ranges where estimating holdover is a concern.
  • With long eye relief and an ultra-forgiving eye box, you’ll be able to quickly get a sight picture and acquire your target. The fast focus eyepiece allows quick and easy reticle focusing.

What These Numbers Mean in the Field

Those specifications tell only part of the story. Here’s what they translate to during actual use:

The 3-9x magnification covers 95% of hunting situations in the Northern Rockies. At 3x, I can quickly acquire a running game in timber. At 9x, I can precisely place shots on elk at 400 yards – though the fixed parallax becomes a limitation beyond 300 yards for precision work.

The 40mm objective provides adequate light gathering without requiring high rings or compromising cheek weld. During a late November whitetail hunt, I could identify legal bucks 30 minutes after sunset – not quite as long as my premium Leupold VX-5HD, but impressive for the price point.

Glass Quality: Where Budget Meets Performance

Let’s address the elephant in the room first: this isn’t Zeiss or Swarovski glass. But here’s what surprised me – it doesn’t need to be for most hunting applications.

Center Clarity Performance

The fully multi-coated lenses deliver genuinely sharp images in the center 80% of the field of view. During load development with my .270, I could clearly see .30-caliber bullet holes in white paper at 100 yards on 9x magnification. That’s the practical standard I use for hunting scopes – if you can see your impacts clearly, the glass is adequate.

Edge distortion becomes noticeable at maximum magnification, particularly the outer 20% of the image. However, we aim with the center of the reticle, not the edges. This limitation hasn’t affected a single shot in three seasons of use.

Low-Light Capability

Dawn and dusk performance determines hunting success more than any other factor in optics. The Crossfire II manages respectable light transmission that extends shooting light by approximately 15-20 minutes compared to iron sights.

During a memorable morning hunt last December, I watched a mature muley buck through this scope for ten minutes before legal shooting light. The image remained clear enough to count points and judge legality, though actual shot placement would have required waiting for better light. That’s exactly the performance level hunters need – seeing well enough to make ethical decisions.

Weather Performance

Montana weather tests equipment mercilessly. The nitrogen-purged construction has prevented internal fogging through temperature swings from 15°F to 75°F in a single day. External lens fogging occurs in extreme conditions, but that’s manageable with proper lens covers and occasional wiping.

Rain performance impressed me during a September elk hunt. Water beaded nicely on the exterior lens coatings, and the scope maintained usable clarity even in steady drizzle. The included lens caps are basic but functional – though I upgraded to Butler Creek flip-ups after the first season.

The Dead-Hold BDC Reticle: Practical Drop Compensation

Vortex’s Dead-Hold BDC reticle represents intelligent design for real-world hunting. Instead of cluttered Christmas-tree patterns that confuse more than help, this reticle provides clean, usable reference points for different distances.

How It Actually Works

The main crosshair zeroed at 100 yards puts most common hunting cartridges approximately 2-3 inches high at 200 yards – perfect for point-blank range hunting. The first hash mark below center typically corresponds to 300 yards, the second to 400, and the third to 500, depending on your cartridge and load.

With my .270 Winchester shooting 130-grain Hornady SSTs, the correlation is close enough for hunting purposes:

  • Center crosshair: 100-yard zero
  • First hash: 285 yards
  • Second hash: 385 yards
  • Third hash: 475 yards

These aren’t precise enough for target competition, but they’ll put rounds in the vital zone of big game consistently.

Field Application

Last November, I had a classic scenario where the BDC proved its worth. A mature whitetail buck stepped out at what I ranged at 340 yards. No time for dialing turrets or consulting ballistic charts. I held the first hash mark just behind his shoulder, squeezed, and watched him drop within 30 yards. The simplicity of the system builds confidence in pressure situations.

For those wanting more precision, Vortex offers a custom ballistic calculator on their website. Input your specific load data, and it generates exact distances for each hash mark. I’ve verified these calculations at the range – they’re surprisingly accurate.

Turret System: Capped and Confident

The capped turret design reveals Vortex’s understanding of hunting versus target shooting priorities. These aren’t the exposed tactical turrets that get bumped out of zero during transport or stalking through brush.

Tracking Accuracy

I ran the standard box test five times at 100 yards, shooting five-shot groups at each corner of a 12-inch square. The scope tracked perfectly, returning to zero every time. Each click provides positive tactile and audible feedback – you know exactly how many adjustments you’ve made even wearing gloves.

The 1/4 MOA clicks translate to roughly 1/4 inch at 100 yards. During sight-in, this precision allows for exact zero without the frustration of mushy or inconsistent adjustments common in budget scopes.

Reset-to-Zero Feature

After achieving zero, you can reset the turret indicators to “0” without tools. This feature proves invaluable when switching between loads or letting someone else use your rifle. You always know exactly where your zero should be and can return to it quickly.

I particularly appreciate this when switching between my 130-grain hunting loads and 150-grain practice ammunition. Each load has a documented number of clicks difference, making transitions foolproof.

Practical Limits

The 60 MOA of total adjustment provides adequate range for most scenarios. However, long-range shooters using significant rail cant might run out of adjustment room. For typical hunting setups, I’ve never come close to the adjustment limits.

Durability: The Montana Torture Test

Durability separates tools from toys in the optics world. Over three seasons, this scope has endured:

The Truck Test

Bouncing around in my pickup for thousands of miles of Forest Service roads, the scope maintained zero perfectly. Many budget scopes develop loose internals from constant vibration – not the Crossfire II.

The Drop Test

During a steep descent while tracking a wounded bull, my sling failed and the rifle tumbled approximately 10 feet down a scree slope. After verifying the rifle was safe, I expected to find a shifted zero or damaged scope. Neither occurred. Three confirmation shots at camp showed point of impact unchanged.

Temperature Extremes

From -25°F during a January predator hunt to 95°F while varmint shooting in August, the scope’s internals remained stable. No point-of-impact shifts, no mechanical failures, no fogging. That’s remarkable consistency for any scope, let alone one at this price.

Water Immersion

Though not intentionally, the scope spent several minutes underwater during a creek crossing gone wrong. The waterproof integrity held completely – no internal moisture, no electrical issues with the reticle (it’s etched glass, not illuminated), and no degradation in image quality.

Eye Relief and Shooting Comfort

The 3.8-inch eye relief deserves special recognition. This generous distance accomplishes several important things:

Recoil Protection

Even with heavy-recoiling rifles like my friend’s .300 Winchester Magnum, the scope never threatened to give anyone “scope eye.” That consistent eye relief builds shooting confidence, especially for newer hunters worried about recoil.

Flexible Shooting Positions

Whether prone with a backpack rest, sitting against a tree, or taking an offhand shot, the forgiving eye box keeps the sight picture clear. I don’t have to search for that perfect head position – the image appears quickly and stays visible through minor head movements.

Cold Weather Compatibility

When wearing heavy winter clothing, maintaining proper eye relief becomes challenging with short-relief scopes. The Crossfire II’s generous distance accommodates bulky parkas without forcing awkward head positions that compromise shooting fundamentals.

Comparing Against the Competition

Through my guide service, I’ve looked through virtually every budget and mid-range scope available. Here’s how the Crossfire II stacks up:

Versus Leupold VX-Freedom 3-9×40

Leupold VX-Freedom 3-9×40 (1 inch) Hunt-Plex Reticle Riflescope
  • Model #181307 – VX-Freedom 3-9×40 Riflescope with a Hunt-Plex Reticle, Capped Finger Click Adjustments and a Matte finish
  • A 3:1 zoom ratio is very common in many scope models. It gives you 3 times more magnification at high power than at low power so you can dial your power down for close encounters or all of the way up for long-range shots.

The Leupold offers slightly better glass clarity and lower light performance. It’s also 2 ounces lighter. However, it costs 50% more than the Crossfire II. Unless weight is critical or you demand that last 5% of optical performance, the Vortex provides better value.

Versus Bushnell Banner 2 3-9×40

Bushnell Banner 2 3-9×40 Hunting Riflescope – DOA Quick Ballistic Reticle,…
  • Purpose Built to Hunt: Hair-splitting contrast, resolution and supreme low-light performance are yours for the taking in this optical upgrade of our legendary Banner series. It’s built tough for deadly accuracy when you need it most. It’s Purpose-Built to Hunt.
  • Excellent Low Light Performance: The Banner 2 rifle scope has improved optical performance over the original Banner that boosts contrast and clarity along with the Dusk & Dawn low light performance that Banner fans love.

Similar price point, but the Banner 2 feels cheaper in hand. Turret clicks are mushier, and the scope is noticeably heavier. Glass quality is comparable in good light but falls behind in challenging conditions. The Vortex wins on overall quality.

Versus Burris Fullfield II 3-9×40

BURRIS FullField II 3-9×40 Rifle Scope, Ballistic Plex Reticle, Matte Black…
  • Popular and premium traditional hunting scope at an affordable price; High-grade optical glass provides excellent brightness and clarity with lasting durability
  • Quality, precision-ground lenses are larger than those of comparable scopes, for better light transmission; Index-matched, Hi-Lume multicoating aids in low-light performance and glare elimination, increasing your success rate

The closest competitor in my experience. Burris glass might be marginally clearer, and the scope is lighter. However, I’ve seen more Burris scopes fail to hold zero under heavy recoil. The Vortex’s superior warranty (lifetime, no questions asked) tips the scales.

Versus Nikon Prostaff 3-9×40

Before Nikon exited the riflescope market, the Prostaff was strong competition. Similar optical quality and features, but Nikon’s departure means no warranty support. Existing Crossfire II owners can rest easy knowing Vortex stands behind their products.

Installation and Setup: Getting It Right

Proper mounting makes or breaks scope performance. Here’s my proven installation process:

Ring Selection

Use quality rings – this isn’t where to save money. I recommend Warne, Leupold, or Vortex’s own rings. For the 1-inch tube, medium height rings usually provide adequate clearance with the 40mm objective.

Mounting Process

  1. Degrease everything – Clean rings, bases, and screws with alcohol
  2. Apply thread locker – Blue Loctite on base screws prevents loosening
  3. Level the rifle – Use a quality level on the action
  4. Position for eye relief – Mount the scope with your typical shooting position
  5. Level the reticle – Critical for long-range accuracy
  6. Torque properly – 15-18 inch-pounds for ring screws typically
  7. Verify eye relief – Check all shooting positions before final tightening

Initial Zero

Start at 25 yards to get on paper, then move to 100 yards for final zero. The Crossfire II typically requires minimal adjustment from bore sight to final zero – a testament to manufacturing consistency.

Real-World Performance Stories

Theory matters less than results. Here are three situations where this scope proved its worth:

The Freezing Dawn Buck

November 2023, 18°F before sunrise. My nephew borrowed my backup rifle wearing this scope for his first deer hunt. After three hours of sitting, a mature whitetail appeared at 180 yards. Despite frozen fingers and excitement, he could quickly acquire the target through the clear glass and generous eye box. One shot, one deer, one happy young hunter. The scope performed when it mattered most.

The Pressure Test

While assisting with a wildlife management hunt, I needed to take multiple shots quickly at different ranges. Seven does at distances from 75 to 310 yards, all needing harvested within minutes before they scattered. The BDC reticle and clear glass allowed accurate holds without thinking. Seven shots, seven clean kills. That’s the kind of practical performance that builds trust in equipment.

The Loan Scope

I keep a Crossfire II mounted on a spare rifle specifically for clients with scope failures. Last season alone, it saved three hunts when primary optics failed. Each time, hunters achieved quick zeros and made successful shots. That versatility and reliability make it perfect for backup duty.

Who Should Buy This Scope

The Crossfire II excels for several specific users:

New Hunters

Starting with quality optics builds good habits. This scope provides enough performance to grow with developing skills without overwhelming features or excessive cost. It’s forgiving enough for beginners yet capable enough they won’t immediately outgrow it.

Backup Rifle Owners

Every serious hunter needs a backup rifle. The Crossfire II provides reliable performance without the investment of premium glass on a gun that might get used once per season. It’s good enough to trust if your primary fails.

Budget-Conscious Shooters

If you’ve got $200 for optics and need maximum value, this is your scope. It outperforms its price point consistently and includes Vortex’s exceptional warranty.

Youth Rifle Setups

The generous eye relief and forgiving eye box make it perfect for young shooters still learning proper form. It’s tough enough to survive the abuse kids dish out while providing optical quality that won’t limit their development.

Who Should Look Elsewhere

This scope isn’t for everyone:

Long-Range Precision Shooters

The fixed parallax and limited magnification make it unsuitable for consistent sub-MOA work beyond 300 yards. Serious long-range shooters need adjustable parallax and likely more magnification.

Competitive Shooters

Target turrets, illuminated reticles, and premium glass matter in competition. The Crossfire II lacks these specialized features.

Dangerous Game Hunters

For buffalo, grizzly, or African dangerous game, invest in premium optics. When your life depends on equipment, buy the best available.

The Warranty Factor

Vortex’s VIP (Very Important Promise) warranty deserves special mention. Unlimited, lifetime, transferable, no questions asked. I’ve personally used it once when a scope (different model) got damaged in a vehicle accident. New scope arrived within two weeks, no charge, no hassle.

This warranty transforms the value equation. Even if something fails years later, Vortex will make it right. That peace of mind matters when you’re miles from nowhere depending on your equipment.

Essential Accessories and Upgrades

While functional from the box, these additions enhance the Crossfire II experience:

Lens Covers

Upgrade to Butler Creek flip-ups immediately. The included caps work but are basic. Quality covers protect your investment and deploy quickly when a game appears.

Lens Cleaning

Keep a LensPen in your pack. The retractable brush and cleaning tip handle field maintenance perfectly. Add quality microfiber cloths and cleaning solution for thorough cleaning at home.

Ring Selection

Don’t cheap out here. Warne Maxima rings ($40-60) provide excellent value. For maximum security, Vortex Pro rings integrate perfectly with their scopes.

Mounting Tools

Invest in a Wheeler FAT wrench for proper torque and a quality level system. Proper installation prevents problems later.

The Five-Year Forecast

Based on three seasons of use and industry trends, here’s my prediction for this scope’s future:

Vortex will likely update the Crossfire line within two years, probably adding illuminated reticle options and possibly adjustable parallax. Current models will remain supported indefinitely given Vortex’s warranty commitment.

The used market remains strong for these scopes – they hold roughly 70% of retail value if maintained well. That’s exceptional depreciation resistance for budget optics.

As more shooters discover this price-to-performance ratio, availability might become sporadic. If you’re considering one, don’t wait for sales – the regular price already represents exceptional value.

Tips for Maximum Performance

After extensive use, these techniques optimize Crossfire II performance:

Parallax Management

With fixed 100-yard parallax, maintain consistent cheek weld for shots at varying distances. Practice your mounting technique until it becomes automatic.

Reticle Usage

Learn your actual drop values, don’t trust generic calculations. Shoot at various distances and record where bullets actually impact relative to hash marks.

Maintenance Schedule

Clean lenses after every hunt. Check ring torque monthly during hunting season. Remove batteries from illuminated models during storage (though the Crossfire II isn’t illuminated).

Temperature Adjustment

In extreme cold, keep the scope at a consistent temperature when possible. Rapid warming can cause temporary external fogging. Plan for this during cold-weather hunts.

The Verdict: Earned Confidence

After three hard seasons of Montana hunting and guiding, the Vortex Crossfire II 3-9×40 has earned permanent residence in my equipment rotation. It’s not perfect – edge clarity could be better, adjustable parallax would be nice, and exposed turrets might benefit some users.

But here’s the reality: for under $200, you get a scope that will reliably put bullets where you aim them in 95% of hunting situations. It’ll survive abuse that destroys lesser optics, maintain zero through temperature extremes and rough handling, and provide clear enough glass to make ethical shots from dark timber to open meadows.

My grandfather always said, “Buy once, cry once” about quality gear. With the Crossfire II, you barely cry at all. It delivers honest performance at an honest price, backed by an exceptional warranty. For new hunters, backup rifles, or anyone needing reliable glass without breaking the bank, it represents outstanding value.

Would I trust it on a once-in-a-lifetime hunt? Probably not – I’d bring premium glass for that. But for everyday hunting, training new shooters, and having a reliable backup when clients’ equipment fails? Absolutely. It’s proven itself repeatedly when results mattered.

The Crossfire II reminds us that good enough often truly is. In a world of $2,000 scopes with features most hunters never use, this simple, reliable optic gets the job done season after season. Sometimes that’s exactly what you need.

Practice makes permanent, so practice it right.


Ready to upgrade your rifle’s optics? Check out my complete guide to mounting scopes properly, or explore our detailed comparison of budget versus premium hunting optics. Your accuracy depends on good glass – choose wisely.

What’s your experience with budget optics? Have you found similar hidden gems that outperform their price point? Share your stories below – I personally respond to every comment, and your insights help other hunters make informed decisions.

AR-15 Optics: Field-Tested Solutions from Montana’s Backcountry to the Ranch Gate

0

The coyote materialized from sage brush two hundred yards out, stalking toward the chicken coop where my wife Sarah had just collected eggs. My ranch AR wore a Vortex PST Gen II that morning—a setup that’s dropped predators, punched paper, and served as backup during search-and-rescue operations across three years of hard Montana use. That clean shot saved our laying hens and validated why modern sporting rifles deserve quality glass, not just whatever’s cheap at the sporting goods store.

After twenty-five years carrying rifles professionally—from Afghanistan’s mountains as a Ranger to protecting livestock on our forty-acre homestead—I’ve learned that AR-15s fill more roles than any other platform. But versatility demands the right optic. The wrong choice limits capability, wastes money, and risks failure when seconds count.

Understanding AR-15 Optic Categories

My grandfather carried an M1 Garand with iron sights through Korea, dismissing scopes as “crutches for poor marksmen.” He wasn’t entirely wrong—fundamentals matter most. But modern threats, whether four-legged predators or two-legged problems, don’t always present ideal shooting conditions.

Through guiding hunters, training law enforcement, and protecting our ranch, I’ve identified three primary AR optic categories:

Close to Medium Range (0-300 yards)

  • Primary uses: Home defense, predator control, ranch work
  • Best options: LPVOs (1-4x or 1-6x), red dots, holographic sights
  • My choice: Changes based on specific need

Medium to Long Range (300-600 yards)

  • Primary uses: Varmint hunting, precision shooting
  • Best options: 3-9x or 4-12x traditional scopes
  • My choice: Depends on terrain and target size

Extended Range (600+ yards)

  • Primary uses: Long-range precision, competition
  • Best options: High-magnification scopes with target turrets
  • My choice: Usually overkill for AR-15 capabilities

Testing Protocol: Montana Style

Every optic reviewed here survived my standard testing:

Environmental Testing

  • Temperature range: -32°F to 98°F (documented)
  • Altitude: 4,000 to 11,000 feet
  • Weather: Rain, snow, dust storms, ice
  • Duration: Minimum three months field use

Functional Testing

  • Round count: Minimum 1,000 rounds per optic
  • Drop testing: Shoulder height onto various surfaces
  • Tracking verification: Monthly box tests
  • Zero retention: Check after every range session

Practical Application

  • Predator control (coyotes, wolves when legal)
  • Target shooting to 500 yards
  • Training courses with law enforcement
  • Search-and-rescue operations
  • Competition when time allows

Low Power Variable Optics (LPVOs)

Vortex PST Gen II 1-6×24: Professional’s Choice

Vortex Optics Viper PST Gen II 1-6×24 SFP Riflescope VMR-2 MOA
  • The Viper PST Gen II takes incredible performance and rock solid features to new heights. The 1-6×24 second focal plane riflescope is incredibly versatile and ideal for close to medium range scenarios.

After three years and approximately 4,200 rounds, this scope has earned permanent residence on my primary AR. It’s not perfect, but it excels where others fail.

Why It Works

Last February, responding to a neighbor’s predator problem, I engaged three coyotes at distances from 40 to 280 yards within two minutes. The PST Gen II’s versatility—from 1x for the close shot to 6x for precise placement at distance—made the difference between success and explaining dead chickens.

The glass quality rivals optics costing twice as much. During dawn and dusk—prime predator movement times—that extra light transmission translates to positive target identification when cheaper glass shows shadows.

Real-World Performance

The VMR-2 reticle stays visible without being cluttered. At 1x with illumination, it functions like a red dot. At 6x, the hash marks provide holdovers without obscuring targets. After a December ice storm that coated everything in half-inch glazing, the scope still tracked perfectly.

Weight (22.7 ounces) is noticeable during all-day carries. The magnification ring stiffness improves with use but benefits from an aftermarket throw lever. These aren’t deal-breakers for a scope that performs when needed.

Installation Notes

Mount with quality rings—I use Aero Precision Ultralight. Proper torque matters more than most realize. Add flip caps for lens protection and a throw lever for rapid magnification changes.

Vortex Strike Eagle 1-6×24: Value Without Sacrifice

Vortex Optics Strike Eagle 1-6×24 Second Focal Plane Riflescope – BDC3 Reticle…
  • The updated Strike Eagle 1-6×24 is defined by speed and versatility. A true 1x on the low end adapts to a wide range of scenarios, letting users engage from close to extended ranges

My nephew runs this scope on his first AR. After two years of use and abuse only a teenager can deliver, it maintains zero and continues performing.

Budget Reality Check

At roughly half the PST Gen II’s price, you sacrifice some glass quality and features. But for ranch work, general shooting, and even hunting, it delivers 80% of premium performance at 50% of the cost.

The BDC3 reticle proves more complex than necessary for close work but excels at medium range. Glass clarity impresses for the price point, though edges show distortion at maximum magnification. Turret tracking remains consistent through temperature extremes.

Who Should Buy This

Perfect for first AR owners, budget-conscious shooters, or anyone needing capable glass without premium pricing. It won’t win precision rifle competitions, but it’ll handle real-world requirements reliably.

Primary Arms SLX 1-6×24: Dark Horse Contender

This scope surprised me. Expecting mediocre performance from the price, I found genuine capability that embarrasses more expensive options.

The ACSS Advantage

The ACSS Nova reticle design shows someone actually shoots these things. The chevron center speeds close-range acquisition while hash marks handle distance work. Unlike complex Christmas-tree reticles that confuse under stress, this stays intuitive.

Daylight brightness actually works—rare in this price range. During bright August afternoons when many reticles wash out, the fiber optic system maintains visibility. That matters when predators don’t wait for ideal lighting conditions.

Surprising Durability

After “accidentally” dropping it during a horse wreck (Scout spooked at a rattlesnake), the scope maintained zero. It’s handled Montana’s temperature swings, dust storms, and enough rounds to prove reliability. Chinese manufacturing has improved dramatically—credit where due.

Traditional Magnified Scopes

Leupold VX-Freedom 3-9×40: American Reliability

Leupold VX-Freedom 3-9×40 (1 inch) Hunt-Plex Reticle Riflescope
  • Model #181307 – VX-Freedom 3-9×40 Riflescope with a Hunt-Plex Reticle, Capped Finger Click Adjustments and a Matte finish

For dedicated hunting or fixed-range shooting, traditional scopes still excel. The VX-Freedom represents Leupold’s entry-level offering that performs above its station.

Hunting Applications

My son used this scope to take his first deer last season—a clean shot at 187 yards through timber. The simple duplex reticle didn’t confuse him under pressure. Glass clarity in low light impressed, especially considering the price point.

The 3-9x magnification range handles most hunting scenarios. From thick timber where 3x provides adequate field of view to open areas where 9x enables precise shot placement, it covers realistic distances without unnecessary complexity.

Build Quality Reality

Leupold’s reputation for durability proves justified. This scope survived being dropped from horseback onto shale (different horse, different day—I need calmer mounts). Zero remained perfect. The aluminum construction and lifetime warranty provide peace of mind when equipment equals meat in the freezer.

Red Dot Sights

Aimpoint PRO: When Reliability Matters Most

Aimpoint PRO Red Dot Reflex Sight with QRP2 Mount and Spacer – 2 MOA – 12841
  • Absolute co-witness with iron sights (with the supplied spacer installed)

For home defense and close-range work, the PRO remains my top choice. After five years of continuous use (yes, continuously on), it’s never failed.

Battery Life Changes Everything

Thirty thousand hours of battery life means leaving it on permanently. No fumbling for buttons during emergencies. No wondering if batteries died. It’s ready when needed—critical for defensive applications.

During a 3 a.m. barn investigation (turned out to be a curious black bear), that always-ready dot meant immediate target acquisition in complete darkness with weapon light. Try doing that with magnified optics.

Bomb-Proof Construction

This optic survived everything I’ve thrown at it—literally. Dropped on concrete, submerged in water, frozen solid, baked on the dashboard. It shrugs off abuse that would destroy lesser optics. Weight (7.8 ounces) seems heavy until you realize it’s armor, not excess.

Professional Applications

Law enforcement agencies and military units choose the PRO for good reason. It works when failure means consequences. For civilian defensive use, that same reliability provides confidence when protecting family matters most.

Sig Sauer Romeo5: Budget Excellence

SIG SAUER Romeo5 1X20mm Tactical Hunting Shooting Durable Waterproof Fogproof…
  • ROMEO5 GUN SIGHT – The ROMEO5 1X20mm Red Dot Sight mounts on any platform, and even though it’s small, it’s tough; The solid, lightweight aluminum design gives peak performance & years of service, so you can be on the top of a hunt or shooting competition

Recommending a sub-$200 red dot felt wrong until I tested the Romeo5. Now my backup rifle wears one, and I’ve gifted two to family members.

Motion Activation Magic

The MOTAC system turns on with movement, off after two minutes of stillness. Sounds gimmicky until you realize it extends battery life to 40,000 hours while ensuring readiness. Grab the rifle, dot appears. Set it down, it sleeps. Simple brilliance.

Durability Surprises

Despite the budget price, this dot handles abuse. Mine survived a trip through the washing machine (don’t ask) and continued functioning perfectly. It’s maintained zero through thousands of rounds and temperature swings that killed a cheaper competitor.

For new shooters, budget builds, or backup rifles, the Romeo5 delivers professional performance at consumer pricing. The only compromise is slight blue tinting—irrelevant for practical use.

Aimpoint Micro T-2: Premium Perfection

Aimpoint Micro T-2 Red Dot Reflex Sight No Mount – 2 MOA -200180
  • Features advanced lens system for better light transmission and unmatched optical clarity

When money’s no object and ounces matter, the T-2 represents the pinnacle of red dot design.

Why It Costs $900

Fifty thousand hours of battery life. Three ounces total weight. Clarity that makes other dots look foggy. Durability that survives military deployment abuse. You’re buying the best, period.

My competition rifle wears one because split seconds and precise shot placement win matches. The unlimited eye relief and parallax-free design mean consistent performance regardless of head position. When mounted on an SBR for building searches during SAR operations, the compact size and proven reliability inspire confidence.

Investment Perspective

At nearly a thousand dollars, this dot costs more than many complete rifles. But quality endures. This optic will outlive multiple rifles, maintaining value and performance. For serious users who can afford it, the T-2 represents buying once and being done.

Holographic Sights

EOTech EXPS2: Different Technology, Specific Advantages

EOTECH EXPS2 Holographic Weapon Sight
  • EOTECH EXPS2-0 – Holographic Sight in black with 68 MOA ring & 1 MOA dot reticle

Holographic sights work differently than red dots, projecting a reticle image that appears to float at target distance. This technology offers unique benefits for specific applications.

Astigmatism Solution

If red dots appear as starbursts due to astigmatism (common issue), holographic sights often appear clearer. My brother-in-law couldn’t use red dots effectively until trying an EOTech. Now he shoots better than ever.

Speed and Precision

The 68 MOA ring with 1 MOA center dot enables both fast acquisition and precise aiming. During close-range drills, that large ring draws the eye naturally. For precision shots, the small center dot enables surgical accuracy.

Battery Life Reality

Here’s the trade-off: 600-1,000 hours of battery life versus tens of thousands for red dots. For duty use where daily checks ensure function, acceptable. For home defense where rifles sit untouched, concerning. Plan accordingly.

Backup Iron Sights: Essential Insurance

Magpul MBUS Pro: Professional Grade

Magpul MBUS PRO Flip Up Steel Front Sight Black MAG275 Bundle with MBUS PRO Rear…
  • Includes front and rear folding back-up sights
  • Black case-hardened steel finished with Melonite QPQ

Every AR needs backup sights. Electronics fail, batteries die, optics break. When technology fails, iron sights save the day.

Why Steel Matters

The Pro series uses steel construction versus polymer. During a training course, I watched polymer sights melt from sustained rapid fire. Steel endures. The additional cost proves worthwhile when equipment failure means mission failure.

Proper Implementation

Mount backups to witness through your optic (co-witness) or offset at 45 degrees. Practice transitions regularly. During a scope failure at a competition (frozen turret), offset irons let me finish the stage. Preparation prevented embarrassment.

Practical Recommendations by Use

Home Defense Setup

  • Primary: Aimpoint PRO or EOTech EXPS2
  • Backup: Magpul MBUS Pro
  • Add-on: Weapon light (essential)
  • Why: Reliability, speed, always ready

Ranch/Farm Rifle

  • Primary: Vortex PST Gen II 1-6×24
  • Backup: Offset iron sights
  • Add-on: Throw lever, sling
  • Why: Versatility for varied distances

Hunting AR

  • Primary: Leupold VX-Freedom 3-9×40
  • Alternative: Primary Arms SLX 1-6×24
  • Add-on: Quality rings, lens covers
  • Why: Glass quality, appropriate magnification

Competition/Precision

  • Primary: Depends on division rules
  • Typical: High-end LPVO or red dot with magnifier
  • Add-on: Premium mounts, throw lever
  • Why: Every advantage matters

Budget Build

  • Primary: Sig Romeo5 or Primary Arms SLX
  • Backup: Basic iron sights
  • Add-on: Save for quality mounts
  • Why: Maximum capability per dollar

Common Mistakes to Avoid

Through teaching courses and fixing others’ setups, I’ve identified recurring errors:

Cheap Mounts on Good Optics: Spending $600 on optics then $30 on mounts wastes money. Quality mounts matter equally.

Wrong Height Rings: Too low prevents proper cheek weld. Too high creates instability. Test before buying.

Ignoring Eye Relief: Improper scope position causes scope bite or difficult sight picture. Set up for YOUR shooting position.

Over-Magnification: More isn’t better. Most AR shooting happens under 200 yards. Plan accordingly.

Neglecting Zeros: Verify zero regularly. Temperature, altitude, and time affect point of impact.

Maintenance for Longevity

Protect your investment through proper care:

Regular Cleaning

  • Blow debris before wiping
  • Use proper lens cloths only
  • Clean turrets and controls monthly
  • Check mount tightness

Deep Maintenance

  • Remove and clean mounting surfaces quarterly
  • Inspect for damage or wear
  • Replace batteries annually regardless
  • Document zeros and adjustments

Storage Wisdom

  • Remove batteries for long-term storage
  • Use lens covers always
  • Store in climate-controlled space
  • Avoid pressure on turrets

The Investment Perspective

Quality optics cost more than many complete rifles. This stops shooters until they calculate actual cost:

$600 optic over 5 years: 33 cents per day $150 red dot lasting 2 years: 20 cents per day Missed opportunity or failed defense: Priceless

Buy quality once rather than mediocrity repeatedly. Good optics transfer between rifles, maintain value, and perform when needed. Consider them investments, not expenses.

Final Recommendations

After testing dozens of AR optics over decades of use:

Best Overall LPVO: Vortex PST Gen II 1-6×24 Versatile, durable, excellent glass, proven performance

Best Red Dot: Aimpoint PRO Reliable, long battery life, bomb-proof construction

Best Budget Option: Sig Romeo5 Surprising quality, motion activation, genuine value

Best Backup Sights: Magpul MBUS Pro Steel construction, proven design, reasonable price

Choose based on actual needs, not internet opinions. A simple setup used properly beats complex systems poorly understood. Practice with whatever you choose—equipment doesn’t replace training.

The Bottom Line from Montana

AR-15s serve more roles than any other rifle platform. From defending homesteads to competing at matches, versatility defines their appeal. But that versatility requires appropriate optics.

Don’t handicap capable rifles with inadequate glass. Whether choosing budget or premium options, buy quality within your means. Maintain properly, train regularly, and trust your equipment when moments matter.

The coyote threatening our chickens didn’t care about my optic’s price. But quality glass made the difference between success and failure. In the end, that’s what matters—performance when needed, reliability when tested.

Remember: perfect equipment can’t fix poor fundamentals, but quality tools enable capable shooters.

Ready to properly equip your AR-15? Explore more field-tested gear reviews and training resources at Moosir.com, where experience meets practical instruction.

Installing Glock Sights: A Montana Guide’s Workshop Method

0

Two years ago, I watched a deputy fumble in near-darkness trying to line up his factory Glock sights on a wounded mountain lion. Those plastic factory sights might as well have been invisible. The next morning, I helped him install tritium night sights in my workshop. Twenty minutes of work potentially saved his life—and definitely improved his confidence. That’s when I realized how many people are running factory sights simply because they think installation requires a gunsmith.

Truth is, I’ve installed hundreds of pistol sights over the years—from quick field replacements in Afghanistan to precision competition setups for local shooters. Glock sights are among the easiest to swap, yet people pay $50-75 for “professional” installation of a task that takes twenty minutes with basic tools.

Let me walk you through the process that’s saved me and my clients thousands in gunsmith fees.

The Ten-Minute Overview

For those in a hurry, here’s the quick version:

  1. Safety clear the pistol (three-check method)
  2. Field strip to remove slide
  3. Remove front sight with 3/16″ nut driver
  4. Drift out rear sight with punch or pusher
  5. Install new front sight (hand tight plus 1/4 turn)
  6. Drift in new rear sight (centered and flush)
  7. Reassemble and function check
  8. Zero at 25 yards

That’s the basics. But the details determine whether you get it right the first time or end up at the gunsmith anyway.

Why Factory Glock Sights Need Replacing

The Plastic Problem

Glock’s factory sights are polymer. In Austrian German, they call them “Visierung”—literally “aiming device.” That’s all they are—minimal aiming devices that meet the basic requirement of having sights.

I’ve seen factory Glock sights:

  • Melt from a hot barrel after extended shooting
  • Break off when dropped on concrete
  • Become invisible in low light
  • Drift out of zero from holster wear

They’re placeholder sights, designed to be replaced. Gaston Glock himself has said as much. Yet I meet shooters who’ve carried the same factory sights for years, trusting their lives to plastic that costs Glock about $0.50 to produce.

When to Upgrade

Replace your sights if:

  • You can’t see them clearly in low light
  • They’ve shifted or loosened
  • You carry for defense (no exceptions)
  • You shoot competitively
  • The plastic shows any wear or damage

Basically, if you’re reading this, you need new sights.

Tools: What You Actually Need

Essential Tools

Front Sight Tool:

  • Best: Glock factory front sight tool
  • Alternative: 3/16″ nut driver
  • Field expedient: 3/16″ socket with extension

Rear Sight Tool:

  • Best: MGW Sight Pro Universal
  • Good: NcSTAR pusher
  • Budget: Brass punch and hammer
  • Emergency: Hardwood dowel and patience

Support Equipment:

  • Padded vise or cradle
  • Blue painter’s tape (protects finish)
  • Gun oil or grease (installation lubricant)
  • Microfiber cloth
  • Good lighting (seriously, this matters)

My Workshop Setup

After years of installations, here’s what lives on my bench:

  1. MGW Sight Pro: Yes, it’s expensive. But I’ve installed 300+ sight sets with zero slide damage. Pays for itself if you help friends.
  2. Glock Armorer’s Tool: The factory 3/16″ tool with the perfect length and grip.
  3. Plastic Drift Set: Prevents marring when things get stubborn.
  4. Digital Calipers: For centering rear sights precisely.

Step-by-Step: The Right Way

Step 1: Safety Protocol (Non-Negotiable)

I don’t care if you “just checked it.” Follow this every time:

  1. Drop the magazine (put it in another room)
  2. Lock slide back and visually inspect chamber
  3. Finger sweep the chamber
  4. Look again (seriously)
  5. Release slide, point in safe direction, pull trigger
  6. Repeat visual inspection one more time

In Afghanistan, we called this “clearing to the point of paranoia.” It’s saved lives.

Step 2: Field Strip the Glock

Glocks strip easier than any pistol I know:

  1. Point in safe direction, pull trigger to release striker
  2. Pull slide back approximately 1/8 inch
  3. Pull down both sides of slide lock lever simultaneously
  4. Push slide forward off frame
  5. Remove recoil spring and barrel (set aside safely)

You now have a bare slide to work with. The frame goes in the safe—we don’t need it.

Step 3: Remove Factory Front Sight

The front sight looks permanent but isn’t:

  1. Flip slide upside down (protect top with tape)
  2. Locate hex screw in front sight post hole
  3. Insert 3/16″ tool (should fit snugly)
  4. Turn counterclockwise (lefty-loosey)
  5. Count rotations (usually 3-4 full turns)
  6. Lift out sight once screw is fully retracted

Common mistake: Over-loosening and dropping the screw inside the slide. Stop when you feel no resistance.

Step 4: Remove Factory Rear Sight

This is where people damage slides. Be patient:

  1. Secure slide in padded vise (or wrap in leather)
  2. Note drift direction (Glocks drift left to right, facing rear)
  3. Apply penetrating oil to dovetail (let sit 2 minutes)
  4. Position punch on LEFT side of sight
  5. Tap firmly but controlled (not hammering)
  6. Work incrementally (tap, check, tap, check)

If using a sight pusher, this becomes:

  1. Mount slide in pusher
  2. Turn adjustment screw slowly
  3. Watch for movement
  4. Continue until sight clears dovetail

Step 5: Prep for New Sights

Before installing anything:

  1. Clean dovetail thoroughly (no oil or debris)
  2. Test fit rear sight (should require pressure)
  3. Check front sight screw length against new sight
  4. Degrease all contact surfaces
  5. Apply tiny drop of blue Loctite to front screw (optional)

Step 6: Install New Front Sight

Precision matters here:

  1. Align sight perpendicular to slide
  2. Insert screw through bottom
  3. Hand tighten until sight seats fully
  4. Check alignment (must be perfectly straight)
  5. Final tighten 1/4 turn past hand tight
  6. Verify sight doesn’t wiggle

Over-tightening strips threads or cracks sights. Under-tightening means losing your front sight during shooting. Find the sweet spot.

Step 7: Install New Rear Sight

The critical step:

With Sight Pusher:

  1. Start sight in dovetail by hand
  2. Mount slide in pusher
  3. Slowly push sight to center
  4. Measure with calipers (equal distance each side)
  5. Test fit in holster

With Punch and Hammer:

  1. Start sight in dovetail (right side, facing rear)
  2. Support slide solidly
  3. Use brass punch only (steel damages sights)
  4. Tap in small increments
  5. Constantly check centering
  6. Final position should be flush and centered

Pro tip: If sight is too tight, remove and lightly sand dovetail bottom with 600-grit paper. If too loose, use purple Loctite or sight adhesive.

Step 8: Reassemble and Function Check

Put it back together:

  1. Replace barrel and recoil spring in slide
  2. Align slide with frame rails
  3. Pull slide back slightly while lowering onto frame
  4. Release forward until it locks
  5. Function check: Rack slide, dry fire, safety check

If something feels wrong, stop and diagnose. Don’t force anything.

Zeroing Your New Sights

The 25-Yard Standard

New sights rarely shoot to point of aim immediately. Here’s my zeroing process:

  1. Start at 7 yards (verify you’re on paper)
  2. Move to 15 yards (rough adjustments)
  3. Fine tune at 25 yards (final zero)

Adjustment Rules

Remember this mantra: “Move rear sight in direction of desired impact”

  • Shooting left? Move rear sight right
  • Shooting low? Need taller front or shorter rear

Most adjustments are tiny—we’re talking 1/32″ movements affecting point of impact by inches at 25 yards.

My Zeroing Target

I use a 3″ orange dot at 25 yards. Why?

  • High visibility
  • Approximate center mass size
  • Clear aiming point
  • Easy to see impacts

Fire 5-round groups, adjust, repeat. When you can keep all shots in the dot, you’re zeroed.

Sight Selection: What Actually Works

For Concealed Carry

Trijicon HD XR: Tritium plus photo-luminescent outline. Visible in all conditions. Narrow front post for precision. My daily carry choice.

For Duty/Service

Ameriglo Bold: Large, highly visible. Tritium inserts. Wide rear notch for stress shooting. What I recommend to law enforcement.

For Competition

Dawson Precision: Fiber optic front, adjustable rear. Bright daylight visibility. Precise sight picture.

Budget Option

TruGlo TFX: Tritium plus fiber optic. Good all-around sight. Reliable construction.

TRUGLO TFX Pro Tritium and Fiber Optic Xtreme Handgun Sights for H&K VP9, VP40,…
  • DAY & NIGHT SIGHT – Upgrade your handgun with the Truglo TFX PRO Sight, specially designed for professional shooters; This Glowing Gun Sight combines a fiber-optic and a tritium vial in a patented capsule, providing ultimate reliability and accuracy

For Aging Eyes

XS Big Dot: Massive front dot. Express-style rear. Fast acquisition. Adequate precision to 25 yards.

XS SIGHTS DXT2 Big Dot Tritium Night Sights. Tritium Front and Rear Set. Fits…
  • Fits: Glock 17,19,19X,22,23,24,26,27,34,35,45,49 models including MOS versions & all generations. Tritium front & tritium rear set. Yellow Front Sight

Common Installation Mistakes

Mistake 1: Using Steel Punches on Sights

Steel on steel means damaged sights or slide. Always use brass or plastic for direct sight contact. I’ve seen $150 sights ruined by a steel punch.

Mistake 2: Forcing Misaligned Parts

If it requires excessive force, something’s wrong. Stop, diagnose, proceed. Forcing things breaks expensive parts.

Mistake 3: Inadequate Slide Support

Unsupported slides bend or crack under hammering. Always support directly under the working area.

Mistake 4: Not Testing Fitment

Always test holster fit after installation. Some sights (especially suppressor-height) may require holster modification.

Mistake 5: Skipping Function Checks

New sights can interfere with slide operation if incorrectly installed. Always fully function test before considering the job complete.

Field Expedient Methods

Emergency Front Sight Removal

Lost your tool? Use a cut-down Allen key or modified drill bit. File to 3/16″ hex shape. Works in a pinch.

No Sight Pusher Method

Sandwich slide between two wood blocks in vise. Use hardwood dowel and hammer. Slower but effective. This is how we did it in Afghanistan with limited tools.

The Freezer Trick

For stubborn rear sights: Freeze slide for 2 hours, heat sight with hair dryer. Thermal expansion difference helps installation. Old gunsmith trick that actually works.

Cost Analysis

DIY Installation:

  • Tools (one-time): $50-200
  • Time: 20-30 minutes
  • Cost per installation: $0

Gunsmith Installation:

  • Labor: $50-75
  • Time: 1-3 days wait
  • Risk: Trusting stranger with your gun

After installing sights on three pistols, you’ve paid for the tools. I’ve saved approximately $5,000 in installation fees over the years—money better spent on ammunition and training.

Maintenance After Installation

Your new sights need minimal care:

  1. Check tightness monthly (especially front sight)
  2. Clean tritium vials with alcohol (oils dim them)
  3. Touch up with sight paint if needed
  4. Verify zero every 500 rounds or after drops
  5. Replace tritium sights every 10-12 years (half-life decay)

When to Call a Professional

Swallow your pride and get help if:

  • You’ve damaged slide or sights attempting installation
  • Sights won’t stay zeroed after proper installation
  • You lack proper tools and can’t justify buying them
  • You’re installing adjustable target sights (require precision)
  • It’s a valuable or collectible pistol

The Bottom Line

Installing Glock sights is a basic skill every serious shooter should possess. With $50 in tools and 30 minutes of time, you can upgrade from dangerous factory sights to professional-grade alternatives.

Don’t trust your life to polymer sights designed as placeholders. Upgrade them, install them correctly, and zero them properly. Your accuracy—and potentially your life—depends on it.

Remember: Good sights don’t make you a better shooter, but bad sights will definitely make you worse.

Practice makes permanent, so practice it right.

Aim true,

Flint Marshall
Northern Montana

Questions about specific sight recommendations or installation challenges? Need advice on sight selection for your application? Drop a comment below or visit Moosir.com for more practical firearms wisdom. Remember—respect the tool, respect the craft, respect yourself.

Field Report: Mecanik MO1 Red Dot – A Montana Guide’s Take on Tactical Optics

0

Last winter, I had to draw my sidearm on a wounded grizzly that charged from thick brush at twelve yards. In that split second, fumbling for iron sights could’ve been fatal. The red dot on my carry pistol saved precious milliseconds—and possibly my life. That experience drove home why I’ve become a convert to micro red dots, even for backcountry carry. When I mounted the Mecanik MO1 on my Canik for testing, I wasn’t expecting much from a sub-$200 optic. Fourteen months later, it’s still on my everyday carry gun.

After running this little red dot through Montana winters, dusty summer training sessions, and over 2,500 rounds of everything from cheap range ammo to defensive loads, I can tell you exactly what it’s worth—and what it isn’t.

The MO1 isn’t trying to compete with the Trijicon RMR or high-end Holosuns. But for someone wanting reliable red dot performance without taking out a second mortgage, this Turkish-made optic deserves serious consideration. Let me show you why.

CANIK Mecanik MO1 Tactical Micro Reflex Sight
  • 3 MOA Red dot sight
  • Designed for duty and concealed carry pistol
  • Automatic brightness adjustment (10 level)

Quick Take: What You’re Getting

The Mecanik MO1 – A motion-activated, auto-brightness micro red dot that punches above its weight class at around $170-$200.

Testing Protocol: Real-World Abuse

Name’s Flint Marshall, and I don’t baby test equipment. Twenty-five years in the field—eight with the Rangers, fifteen guiding hunters through Montana’s backcountry—taught me that gear either works when it matters or it doesn’t. There’s no middle ground.

My testing philosophy is simple: abuse it worse than real life ever will, then see if it still works. Here’s what the MO1 endured:

Round Count Torture: 2,547 rounds total, including:

  • 1,000 rounds of Winchester white box (the torture test of ammunition)
  • 500 rounds of Federal HST 124-grain defensive loads
  • 500 rounds of Blazer aluminum case (tests feeding and ejection)
  • 547 rounds of various reloads and +P loads

Environmental Hell:

  • Frozen at -28°F in my deep freezer, then immediately shot 50 rounds
  • Baked on the truck dashboard in 102°F heat for 8 hours
  • Dunked in Flathead Lake for 45 minutes
  • Carried daily for 14 months, including horseback rides and ATV adventures

The Drop Test: Dropped the pistol (holstered and unholstered) from shoulder height onto concrete five times. Why five? Because Murphy’s Law says the sixth drop is when things break, and I want to know the margin.

Technical Specifications That Actually Matter

The Numbers Game

  • Dot Size: 3 MOA (perfect balance for speed and precision)
  • Weight: 0.70 ounces with battery (lighter than two loaded 9mm magazines)
  • Battery: CR2032 (available everywhere, even gas stations)
  • Battery Life: Claims 60,000 hours (I’m at 14 months and counting)
  • Waterproof: IPX7 rated (survived my lake test)
  • Construction: 6061-T6 aluminum (same as quality scope rings)
  • Footprint: Shield RMSc (fits many compact pistols)

What Those Numbers Mean

That 3 MOA dot is the sweet spot. At 25 yards, it covers 0.75 inches—small enough for precision work but large enough to find quickly under stress. The motion sensor activation means the battery life claim might actually be realistic. In 14 months of daily carry, I haven’t changed the battery yet.

Real Performance: Where Rubber Meets Road

Accuracy and Target Acquisition

Here’s the truth: switching from iron sights to a red dot takes adjustment. My first range session was humbling—I was slower and less accurate than with irons. But after 500 rounds of focused practice, everything clicked.

At 10 yards (realistic defensive distance), I’m consistently putting five shots into a 2-inch circle as fast as I can press the trigger. At 25 yards, groups open to about 3 inches—more than acceptable for defensive use. The dot stays crisp and round even at maximum brightness, unlike some budget dots that turn into comets.

During low-light training with my tactical flashlight, the auto-brightness feature proved its worth. The dot dimmed appropriately when the light reflected off walls, then brightened when aimed into darkness. Smart engineering that actually works.

The Motion Sensor Magic

This feature alone justifies the purchase. Draw your pistol, and the dot activates instantly—no buttons, no thinking, just a bright dot ready to work. After eight seconds of stillness, it hibernates. Set your pistol down for thirty minutes, pick it up, and the dot’s there immediately.

I tested this feature obsessively. Quick draws, slow draws, drawing from concealment—it activated every single time. Even when drawing with cold, numb fingers during winter training, the sensor never failed.

Battery Life Reality

Manufacturers lie about battery life like fishermen lie about fish size. But the MO1’s 60,000-hour claim seems honest. Here’s my math: With the motion sensor, the dot’s actually “on” maybe two hours per week (generous estimate). At that rate, the battery should last years.

The catch? Battery replacement requires removing the optic. You’ll lose zero and need to re-sight. Not ideal, but at this price point, acceptable. Pro tip: Replace the battery annually during your birthday month—make it routine maintenance.

Durability Assessment

After 14 months of daily carry and 2,500+ rounds, here’s the wear report:

Still Perfect:

  • Glass clarity (no scratches or coating degradation)
  • Dot consistency (still round and crisp)
  • Zero retention (hasn’t shifted once properly mounted)
  • Motion sensor (works like day one)

Shows Wear:

  • Finish around battery cap (minor scratches from repeated opening)
  • Adjustment turret covers (some paint wear)
  • Mounting screws (slight discoloration from Loctite)

Failed: Nothing. Absolutely nothing has failed.

The IPX7 waterproofing proved legitimate during an unexpected creek crossing when my horse decided to take a bath with me aboard. The pistol and optic were submerged for several minutes. No fogging, no electrical issues, no problems.

Installation and Zero Process

Mounting Reality Check

The Shield RMSc footprint means broad compatibility, but verify your specific pistol. On my Canik, installation took fifteen minutes:

  1. Degrease Everything: Acetone on all mounting surfaces
  2. Blue Loctite: On screws, but sparingly
  3. Torque Properly: 12 inch-pounds (borrow a torque driver)
  4. Witness Marks: Sharpie across screw heads and optic body

Zeroing Strategy

Start at 7 yards to get on paper, then move to 15 yards for fine-tuning. The MO1 comes “pre-zeroed” for Canik pistols, and surprisingly, mine needed only minor windage adjustment. Each click moves impact 1 MOA at 100 yards (about 0.15 inches at 15 yards).

My zero process:

  1. Bench rest at 15 yards
  2. Fire three-shot group
  3. Adjust based on group center, not individual shots
  4. Confirm at 7, 15, and 25 yards
  5. Verify with defensive ammunition

Compared to the Competition

Versus Trijicon RMR ($450+)

The RMR is bombproof—literally designed for military use. Better glass, manual brightness control, and proven reliability. But it costs more than double the MO1. Unless you’re kicking doors professionally, the MO1 provides 80% of RMR performance at 40% of the price.

Versus Holosun 507K ($250-$300)

HOLOSUN HS507K X2 Multi-Reticle Red 2 MOA Dot & 32 MOA Circle Open Reflex Pistol…
  • HOLOSUN RED DOT SIGHT – The HS507K X2 is an open reflex optical sight designed for subcompact pistol applications; It features Lock Mode that locks the buttons preventing inadvertent setting changes; This handgun sight is a direct for P365X/XL, and requires an adapter plate for slides with a four-boss interface; Multi Tool, Lens Cloth, and User Manual are included

The Holosun offers multiple reticle options and solar backup. Nice features, but unnecessary for defensive use. The side-loading battery is genuinely useful. If you’ve got the extra $100, the Holosun is the upgrade. If not, the MO1 won’t let you down.

Versus Vortex Viper ($230)

Vortex Optics Viper Red Dot Sight – 6 MOA Dot
  • The Viper Red Dot Sight has a super low-profile making it perfect for use with cut-out slides. 1 MOA windage and elevation adjustments are super sleek and make sighting in a breeze.

Similar price, shorter battery life (150 hours vs. 60,000), no motion sensor. The Vortex name carries weight, but the MO1 is the better value proposition.

Living With the MO1: Daily Carry Reality

Concealment Considerations

At 0.70 ounces, the MO1 adds minimal weight. Height adds 0.9 inches to your pistol’s profile—noticeable but manageable with proper holster selection. I run a Vedder LightTuck that accommodates the optic perfectly.

Training Observations

The learning curve is real. My first hundred draws were awkward—searching for the dot instead of presenting naturally. Now, after deliberate practice, the dot appears automatically in my sight picture. The key is consistent presentation and lots of dry-fire practice.

Pro tip: Practice finding the dot with your eyes closed. Present the pistol, then open your eyes. If the dot’s not there, adjust your grip and stance. Repeat until it becomes natural.

Maintenance Requirements

Minimal. I clean the lens weekly with a microfiber cloth (breathing on it first for moisture). Check mounting screws monthly—they haven’t loosened yet with proper Loctite. The aluminum body wipes clean with a silicone cloth.

The Tactical Reality: When Seconds Count

Here’s what most reviews won’t tell you: In a defensive situation, you won’t notice minor optical imperfections or worry about battery compartment placement. You’ll see a bright dot, put it on target, and press the trigger. The MO1 does this fundamental job reliably.

During force-on-force training with simunition, the red dot advantage became clear. Target transitions were faster, accuracy under stress improved, and—critically—I could keep both eyes open for situational awareness. Iron sights can’t match this.

Real Limitations (The Honest Truth)

Bottom Battery Compartment: Changing batteries requires re-zeroing. Plan for annual replacement and factor in range time and ammunition cost.

No Manual Override: The auto-brightness works well, but sometimes you want manual control. Dawn and dusk can confuse the sensor briefly.

Limited Adjustment Range: 100 MOA total adjustment might not accommodate extreme zeros or problematic mounting situations.

Edge Tinting: Slight blue tint at glass edges. Unnoticeable during actual shooting but present if you look for it.

Brand Recognition: “Mecanik” doesn’t carry weight like Trijicon or Aimpoint. Resale value will be lower.

Who Should Buy This

Perfect For:

  • First-time red dot users not ready for major investment
  • Concealed carriers wanting red dot advantages affordably
  • Competitive shooters needing backup optics
  • Anyone building a budget-conscious defensive pistol

Skip If:

  • You’re military or law enforcement (get the RMR)
  • You demand manual brightness control
  • You change batteries more than annually
  • Brand prestige matters to you

The Bottom Line: Value Meets Performance

The Mecanik MO1 represents something rare in the optics world: honest value. It’s not pretending to be an RMR or trying to out-feature Holosun. Instead, it does the fundamentals correctly at a price that doesn’t require selling a kidney.

After 14 months and thousands of rounds, I trust this optic. It lives on my daily carry pistol—that’s the ultimate endorsement. When that grizzly charged last winter, I didn’t think about whether my optic would work. It just did. The dot was there, bright and centered, when I needed it most.

For $170-$200, you’re getting:

  • Reliable performance that doesn’t quit
  • Smart features that actually improve usability
  • Durability that survives real-world abuse
  • Accuracy sufficient for any defensive scenario

You’re not getting:

  • Premium glass clarity
  • Cutting-edge features
  • Bragging rights at the range
  • Convenient battery replacement

Final Verdict: A Working Man’s Red Dot

The Mecanik MO1 is like my old truck—not fancy, not perfect, but reliable as sunrise and adequate for any job I throw at it. It won’t impress your buddies or win innovation awards, but it will put dots on targets day after day without drama.

In a world where optics prices have gone insane, the MO1 reminds us that good enough is often exactly that—good enough. It’s the optic I recommend to friends who want red dot performance without red dot prices.

My grandfather used to say, “Don’t let perfect be the enemy of good.” The MO1 embodies that wisdom. It’s good—really good—at a price that leaves money for ammunition and training. And training, not equipment, is what wins fights.

Remember: A red dot doesn’t make you a better shooter. It makes you a faster shooter. Speed without accuracy is just noise. Train accordingly.

Practice makes permanent, so practice it right.

Stay dangerous,

Flint Marshall
Northern Montana


Questions about transitioning to red dot sights or defensive pistol setup? Share your experiences below or check out more practical gear reviews at Moosir.com. Remember—respect the tool, respect the training, respect yourself.